
Replacing a water pump can feel intimidating if you have never worked on your car before. But with the right approach, some patience, and basic tools, most people can handle this repair at home. Changing a failing water pump not only protects your engine from overheating, but also saves you money on labor costs.
In this guide, you will learn each step of the process, what to watch out for, and tips that can help you avoid common mistakes. Whether you’re a beginner or already have some experience, this article will help you do the job right.
Understanding The Water Pump’s Role
The water pump is a vital part of your car’s cooling system. Its main job is to circulate coolant from the radiator through the engine and back. This flow keeps your engine at a safe temperature. If the pump fails, the engine can overheat quickly, which can cause serious damage. Signs of a failing water pump include coolant leaks, whining noises, and rising engine temperature. Replacing it at the first sign of trouble is important.
Tools And Materials You’ll Need
Before you start, gather all necessary tools and parts. Here’s a list to help you prepare:
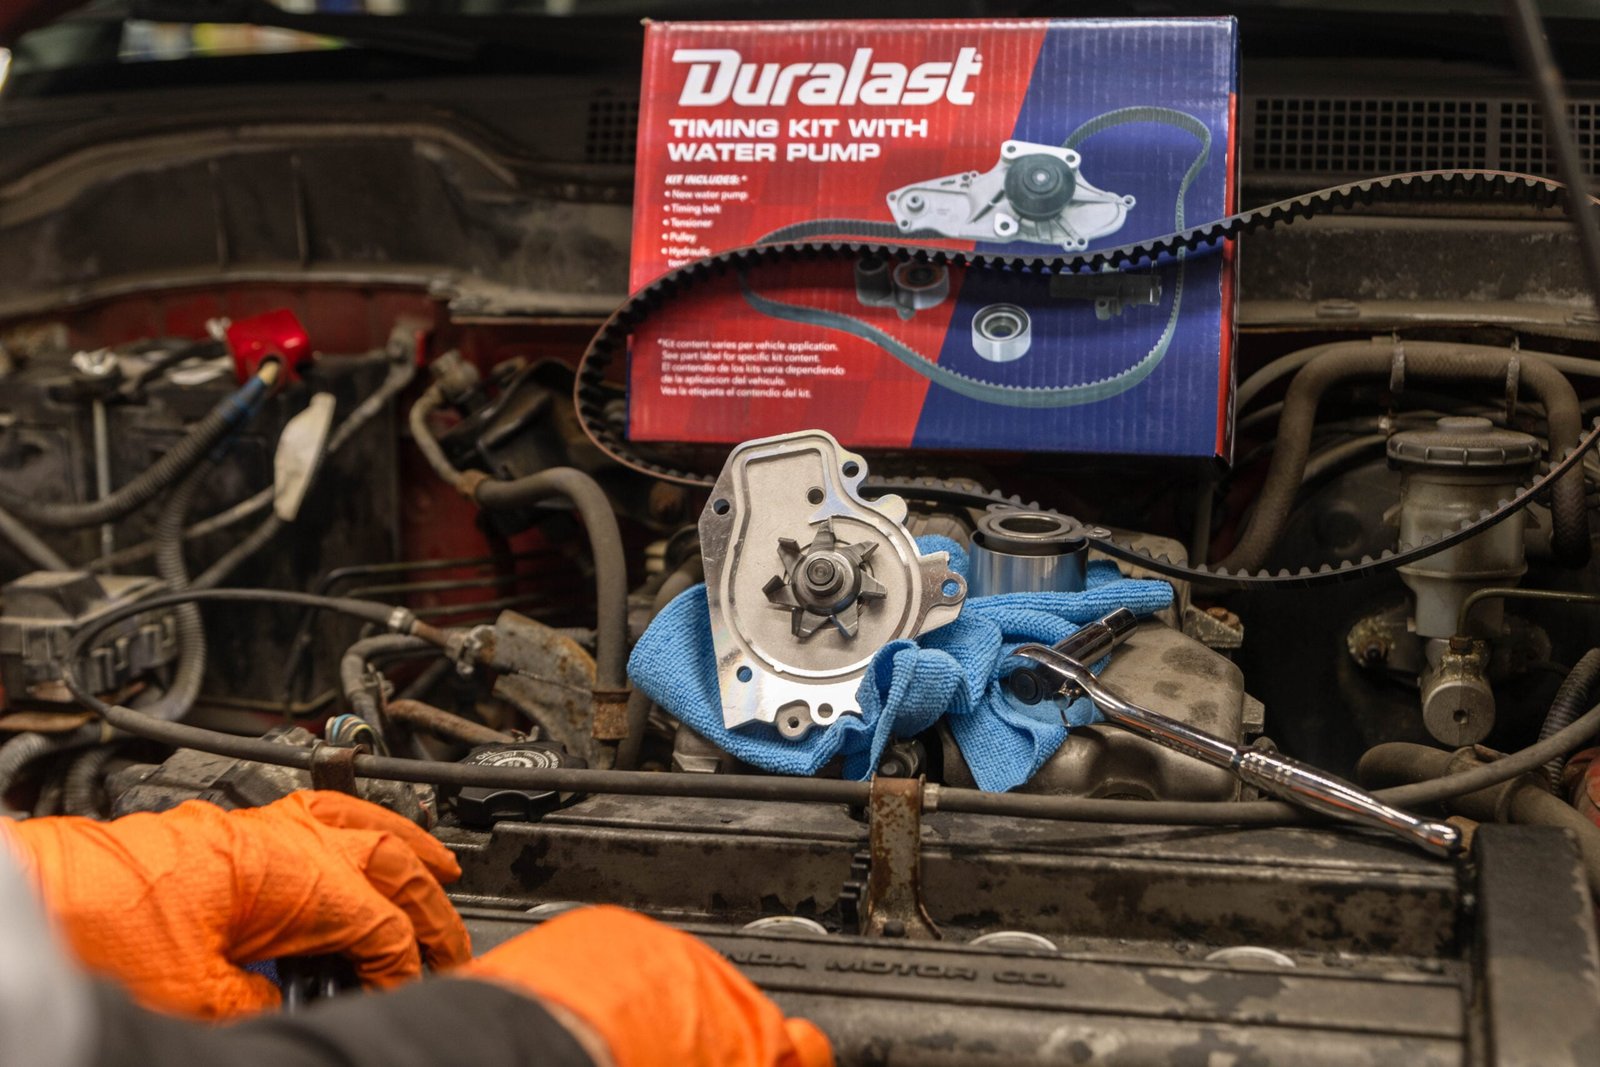
- New water pump (make sure it matches your car’s make and model)
- Gasket or sealant (often comes with the new pump)
- Coolant (enough to refill your system)
- Basic hand tools:
- Socket set
- Wrench set
- Screwdrivers
- Pliers
- Torque wrench (for tightening bolts correctly)
- Drain pan (to catch old coolant)
- Gasket scraper or razor blade
- Clean rags
- Jack and jack stands (if needed for access)
- Service manual (vehicle-specific instructions)
Some cars require special tools, such as pulley pullers. Check your car’s manual before starting.
Preparing Your Vehicle
Proper preparation makes the job safer and easier. Here’s how to get ready:
- Park on a level surface and let the engine cool completely. Working on a hot engine is dangerous.
- Disconnect the battery. This prevents accidental shorts.
- Raise the vehicle using a jack and secure it with jack stands if you need more space underneath.
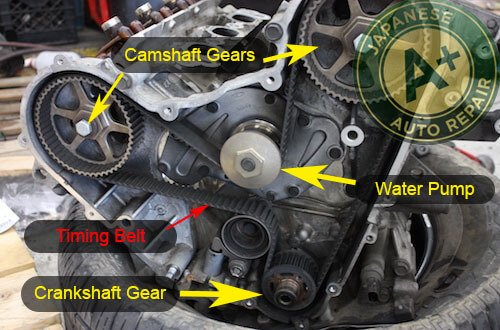
- Locate the water pump. It is usually attached to the front of the engine, driven by the timing or serpentine belt.
A common mistake is not allowing the engine to cool enough before starting. Hot coolant can cause severe burns. Always check that the system is cool to the touch.
Draining The Coolant
Removing old coolant is necessary before you take out the pump.
- Place the drain pan under the radiator.
- Open the radiator drain plug or remove the lower radiator hose to let coolant flow out.
- Dispose of old coolant safely. Most auto parts stores will accept used coolant for recycling.
Be careful—coolant is toxic to people and animals. Clean up any spills right away.
Credit: aplusjapaneseautorepair.com
Removing The Old Water Pump
This step can be challenging because of tight spaces and stuck parts. Take your time.
- Remove belts: Take off the serpentine or timing belt covering the water pump. For most cars, you’ll need to loosen the tensioner pulley.
- Remove hoses: Disconnect the hoses attached to the water pump. Use pliers to slide off hose clamps.
- Remove bolts: Unscrew the bolts holding the water pump. Keep track of their location, as they may be different sizes.
- Remove the pump: Gently tap and pry the pump away from the engine block. Some coolant will likely spill out.
If the pump is stuck, avoid using too much force, which can damage the mounting surface. Instead, use a rubber mallet or gently wiggle the part.
Cleaning The Mounting Surface
A clean surface is crucial for preventing leaks.
- Use a gasket scraper or razor blade to remove all old gasket material.
- Wipe the area with a clean rag to remove debris and oil.
- Inspect the surface for cracks or damage.
Most beginners forget to clean the surface completely, leading to leaks later. Take your time with this step.
Installing The New Water Pump
Now you’re ready to fit the new pump.
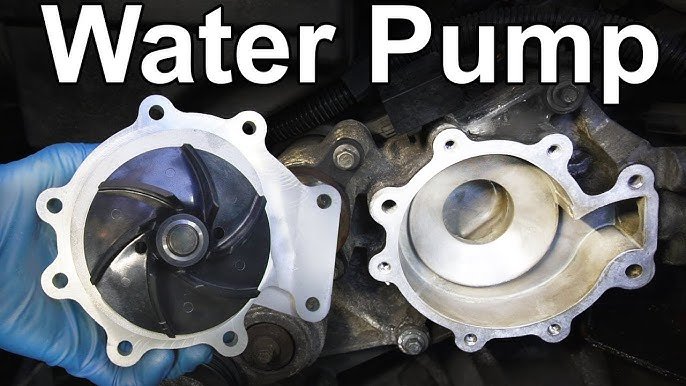
- Check the new pump: Make sure it matches the old one exactly.
- Install the gasket: Place the new gasket or apply sealant as directed in the instructions. Do not use both unless specified.
- Align and attach the pump: Fit the pump onto the engine block, lining up the bolt holes.
- Insert bolts: Thread in all bolts by hand first, then tighten with a wrench.
- Torque bolts: Use a torque wrench to tighten bolts to the specifications in your service manual.
Over-tightening can warp the pump or strip threads. Always follow the correct torque values.
Reattaching Belts And Hoses
With the pump in place, reconnect everything you removed.
- Attach hoses: Slide hoses back on and secure with clamps.
- Reinstall belts: Fit the serpentine or timing belt. Make sure it is routed correctly and at the proper tension.
- Double-check connections: Make sure everything is secure before moving on.
For cars with timing belts, make sure the timing marks are lined up before reinstalling the belt. An error here can cause engine damage.
Refilling And Bleeding The Cooling System
You need to refill the system with fresh coolant and remove air pockets.
- Close the drain plug or reattach the lower radiator hose.
- Pour coolant into the radiator or reservoir until full.
- Start the engine and let it run with the radiator cap off. This helps air escape.
- Watch for bubbles: As the engine warms up, you’ll see air bubbles rise. Add coolant as needed.
- Replace the radiator cap once bubbling stops and the coolant level remains steady.
- Check for leaks around the pump and hoses.
Some cars have a bleeder valve to make this process easier. Check your manual for special instructions.
Testing And Final Checks
After the new pump is installed and the system is full, it’s time to test your work.
- Start the engine and let it reach operating temperature.
- Check the temperature gauge to make sure the engine does not overheat.
- Inspect for leaks around the new pump, hoses, and radiator.
- Check coolant level again after a short drive and top up if necessary.
If you see leaks or hear strange noises, turn off the engine and inspect your work. Sometimes a clamp or bolt needs a minor adjustment.
Credit: www.autozone.com
Common Mistakes To Avoid
Even careful people make errors when changing a water pump. Here are some pitfalls and how to avoid them:
- Skipping the gasket cleaning: Old gasket remains can cause leaks.
- Using wrong coolant: Always use the type recommended for your car.
- Incorrect bolt torque: Overtightening or undertightening can cause damage.
- Not bleeding air: Air in the system can lead to overheating.
- Mixing old and new coolant: Old coolant can contaminate the system.
If you’re unsure, always check your vehicle’s service manual or ask a trusted mechanic.
Cost And Time Comparison
Replacing a water pump at home can save you a lot of money. Here’s how it compares to a professional repair:
| Method | Estimated Cost | Estimated Time |
|---|---|---|
| DIY Replacement | $50–$200 (parts) | 2–5 hours |
| Professional Mechanic | $300–$800 (parts + labor) | 1–3 hours |
Labor costs can vary a lot based on your car’s make and model. Some cars have easier access to the water pump than others.
When To Replace The Water Pump
You don’t always have to wait for a failure to replace your water pump. Here are good times to do the job:
- When you see coolant leaks under your car.
- If you hear a whining or grinding noise from the engine.
- When replacing the timing belt (many cars recommend changing both together).
- If your car overheats and the pump is several years old.
Preventive replacement is cheaper than fixing a damaged engine due to overheating.
Signs Of A Failing Water Pump
It helps to know what to watch for. Here are signs your pump might need replacement:
| Sign | What It Means |
|---|---|
| Coolant leak near engine | Seal or gasket failure |
| High-pitched noise | Bad bearing inside the pump |
| Steam from radiator | Possible overheating |
| Engine temperature rising | Poor coolant flow |
If you notice any of these, it’s best to inspect the pump right away.
Credit: www.youtube.com
Practical Tips For A Smooth Replacement
A few extra tips can make the process easier:
- Take photos before you remove belts and hoses. This helps when reassembling.
- Label bolts or lay them out in order. This prevents confusion.
- Check the old pump for signs of internal engine problems, like rust or sludge.
- Replace hoses or belts that look worn. It’s easier to do while everything is apart.
- Use gloves and eye protection when working with coolant.
Many people forget to check the condition of related parts, which can lead to extra repairs later.
Environmental And Safety Considerations
Coolant is toxic. Always:
- Store old coolant in a sealed container.
- Dispose of it at a recycling center or auto shop.
- Clean spills right away to keep pets and wildlife safe.
Never pour coolant down the drain or on the ground. Local laws may have strict rules on disposal. For more, see the guidelines from the US Environmental Protection Agency.
Frequently Asked Questions
How Often Should A Water Pump Be Replaced?
Most water pumps last 60,000 to 100,000 miles. It’s often replaced during timing belt changes or when it shows signs of failure.
Can I Drive With A Bad Water Pump?
It’s risky. A failing pump can lead to engine overheating within minutes, which can cause expensive damage. It’s best not to drive until the pump is fixed.
Do I Need Special Tools For Water Pump Replacement?
Most jobs need only basic hand tools. Some models may require a special pulley puller or tensioner tool. Check your service manual.
How Do I Know If My Water Pump Is Leaking?
Look for coolant puddles under your car, or signs of dried coolant (white or green stains) near the pump. You may also smell sweet coolant under the hood.
Is It Necessary To Change The Thermostat With The Water Pump?
It’s not required, but it’s a good idea if your car is older or the thermostat is hard to reach. Both parts are important for engine cooling.
Replacing a water pump may take some time, but it’s a valuable skill that can save you money and prevent engine damage. With careful attention to detail, the right tools, and a bit of patience, you’ll be back on the road with a reliable cooling system.