Following step by step car repair instructions involves accurately diagnosing the problem, gathering the right tools and safety gear, and sourcing a reliable guide for your specific vehicle. Once you have the correct parts, you can methodically complete the repair and test your work before driving.
- Prioritize safety above all else by using proper equipment like jack stands and safety glasses.
- An accurate diagnosis is the most critical first step to avoid unnecessary work and expense.
- Vehicle-specific instructions from a repair manual or trusted source are essential for success.
- Start with simple, beginner-friendly repairs to build confidence and skills.
- Recognize your limits and know when a job is best left to a professional mechanic.
Why Learning DIY Car Repair is a Skill Worth Having

Learning to perform your own car repairs is more than just a way to handle maintenance; it’s a valuable skill that offers numerous benefits. It empowers you with a deeper understanding of how your vehicle works, transforming you from a passive driver into an informed owner. This knowledge can be crucial when dealing with unexpected issues or when communicating with professional mechanics.
Beyond the practical aspects, there is immense satisfaction in successfully diagnosing and fixing a problem yourself. Each completed job builds confidence and self-reliance. Over time, you develop a set of practical skills that are useful for life, allowing you to maintain one of your most significant investments and ensure its longevity and reliability.
Safety First: The Non-Negotiable Rules of Auto Repair
Before you pick up a single tool, understanding and committing to safety protocols is paramount. A garage can be a hazardous environment if proper precautions are not taken. Never compromise on safety for the sake of speed or convenience.
Always work in a well-lit and well-ventilated area to avoid inhaling harmful fumes. Keep a fire extinguisher rated for chemical and electrical fires nearby. Adhering to these fundamental rules ensures that your DIY repair experience is both productive and safe.
- Use Jack Stands: Never work under a vehicle supported only by a jack. Always use a pair of appropriately rated jack stands on a solid, level surface.
- Disconnect the Battery: Before working on electrical components or the fuel system, disconnect the negative battery terminal to prevent short circuits or accidental starting.
- Wear Protective Gear: Safety glasses are essential to protect your eyes from debris and fluids. Gloves will protect your hands from cuts, grease, and chemicals.
- Chock the Wheels: When lifting a vehicle, always place wheel chocks behind the wheels that remain on the ground to prevent rolling.
- Avoid Hot Components: Allow the engine, exhaust, and cooling system to cool down completely before starting work to prevent severe burns.
- No Loose Clothing or Jewelry: Remove any jewelry and avoid wearing loose-fitting clothes that could get caught in moving engine parts.
Building Your DIY Toolkit: Essential Gear for Any Job
Having the right tools is essential for following any repair instructions effectively. While you don’t need a professional-grade workshop to start, a solid foundation of quality tools will make most jobs easier and safer. Your collection can grow over time as you tackle more complex projects.
Basic Hand Tools
This core set of tools will be used in nearly every repair. Invest in a quality set, as they will last for years. Key items include a comprehensive socket set with various drive sizes (1/4″, 3/8″, 1/2″), a set of combination wrenches, a variety of screwdrivers (Phillips and flathead), and several types of pliers (needle-nose, standard, and locking).
Safety and Lifting Equipment
This category is non-negotiable for any work that involves getting under the car. You will need a reliable hydraulic floor jack, a pair of jack stands with a sufficient weight rating for your vehicle, and a set of wheel chocks. Safety glasses and durable mechanic’s gloves are also must-haves.
Diagnostic Tools
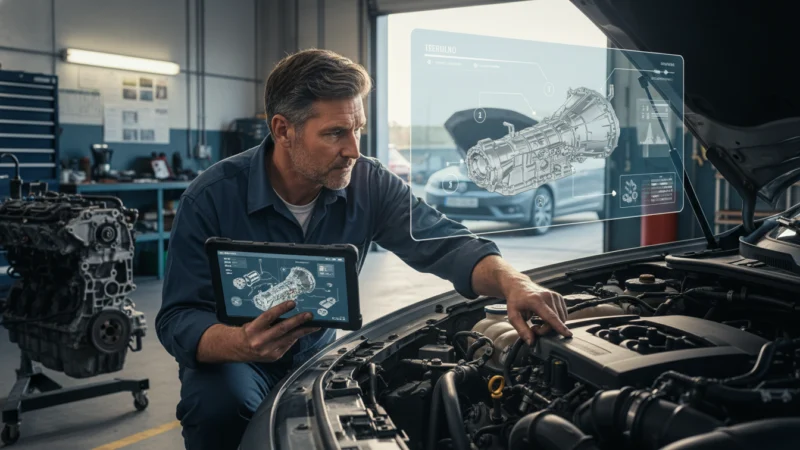
Modern vehicles rely heavily on electronics. An OBD-II (On-Board Diagnostics) scanner is an invaluable tool for reading trouble codes from your car’s computer, which can point you toward the source of a problem. A digital multimeter is also essential for diagnosing electrical issues by testing voltage, current, and resistance.
Job-Specific Tools
As you advance, you’ll encounter jobs that require specialized equipment. A torque wrench is crucial for tightening bolts to the manufacturer’s specifications, preventing damage or component failure. Other examples include oil filter wrenches, brake caliper tools, and ball joint separators.
How to Accurately Diagnose Your Car’s Problem
An accurate diagnosis is half the battle. Simply replacing parts based on a guess can be a frustrating and fruitless exercise. A methodical approach will help you pinpoint the true cause of the issue before you begin the repair.
Start by observing the symptoms. What do you see, hear, feel, or smell? Is the noise a clunk, a squeal, or a hiss? Does the problem only happen when the car is cold or during acceleration? Documenting these details provides crucial clues.
Next, use an OBD-II scanner if the check engine light is on. The scanner will provide Diagnostic Trouble Codes (DTCs). It’s important to remember that a code often indicates a symptom, not the specific part that has failed. Research the code online for your specific make and model to understand common causes. Finally, perform a visual inspection of the relevant area, looking for anything obvious like leaks, frayed wires, or cracked hoses.
Finding Reliable Step by Step Car Repair Instructions
Once you have a diagnosis, the next step is to find clear, accurate, and vehicle-specific instructions. The quality of your guide can make the difference between a successful repair and a costly mistake. Fortunately, there are several excellent resources available.
Vehicle-Specific Repair Manuals
The gold standard for DIY repair information is a dedicated repair manual for your car’s exact make, model, and year. Companies like Haynes and Chilton have published detailed manuals for decades. For the most comprehensive information, a Factory Service Manual (FSM) produced by the vehicle manufacturer is the ultimate resource, though it can be more technical.
Online Video Tutorials
Platforms like YouTube are filled with video guides for nearly every imaginable car repair. The visual nature of video can be incredibly helpful. However, quality varies widely. Look for creators who are clear, show the entire process, explain the ‘why’ behind the steps, and use proper safety procedures. Always read the comments section for feedback and potential corrections from other viewers.
Online Forums and Communities
Vehicle-specific forums are a treasure trove of information. These communities are filled with enthusiasts and experienced owners who often post detailed, photo-heavy write-ups of their repairs. You can also ask questions and get advice tailored to your exact situation.
Sourcing the Right Parts: OEM vs. Aftermarket
With instructions in hand, you need to acquire the correct replacement parts. You’ll generally face a choice between OEM and aftermarket parts.
OEM Parts
OEM stands for Original Equipment Manufacturer. These are the same parts that your car was built with at the factory. They guarantee a perfect fit and are built to the manufacturer’s quality standards. They are typically sourced from a dealership’s parts department.
Aftermarket Parts
Aftermarket parts are made by companies other than the original manufacturer. The quality and fit can range from excellent to poor. Reputable aftermarket brands often provide parts that meet or exceed OEM specifications. These parts are widely available from auto parts stores and online retailers, offering a broader selection.
For critical electronic sensors or complex components, OEM is often the safest bet. For common wear-and-tear items like brake pads, filters, or belts, high-quality aftermarket parts can be an excellent choice.
The Universal Repair Process: A Framework for Success
While every job is different, most repairs follow a universal workflow. Adopting this methodical process will help you stay organized, avoid mistakes, and ensure a successful outcome.
- Research and Preparation: Read or watch the entire repair procedure from start to finish before you begin. This helps you understand the scope of the job and anticipate any tricky steps.
- Gather Tools and Parts: Lay out every tool, part, and chemical you will need. This prevents interruptions in the middle of the job to search for a specific socket or fluid.
- Prepare the Vehicle: Park on a flat, level surface, engage the parking brake, and chock the wheels. Disconnect the negative battery terminal as a standard safety measure.
- Disassembly: Follow the instructions carefully. Use magnetic trays or labeled plastic bags to keep track of nuts, bolts, and small components. Taking photos with your phone at each stage is an invaluable reference for reassembly.
- Compare Old and New Parts: Before installing the new component, hold it up next to the old one. Verify that all mounting points, connectors, and dimensions are identical.
- Installation and Reassembly: Install the new part and reassemble everything in the reverse order of removal. Use a torque wrench to tighten critical fasteners to the manufacturer’s exact specifications.
- Final Checks: Double-check that all electrical connectors are plugged in, all hoses are connected, and no tools have been left in the engine bay.
- Testing: Reconnect the battery, start the vehicle, and check for leaks or unusual noises. Perform a test drive in a safe, low-traffic area to confirm the repair was successful.
5 Beginner-Friendly Repairs You Can Tackle This Weekend
Getting started with DIY repair is best done with simple, low-risk jobs. These tasks require basic tools, have readily available instructions, and provide a great confidence boost.
- Engine Oil and Filter Change: This is the most fundamental maintenance task. It teaches you about locating drain plugs, using an oil filter wrench, and working safely under your car.
- Engine Air Filter Replacement: Often requiring no tools at all, this job is as simple as opening a housing, swapping the old filter for a new one, and closing it back up.
- Windshield Wiper Blade Replacement: A critical safety item that can be replaced in minutes. It’s a perfect first-time repair.
- Battery Replacement: This involves disconnecting terminals, removing a hold-down bracket, and swapping the old battery for a new one. It’s a straightforward job that requires attention to safety (connecting positive first, then negative).
- Headlight or Taillight Bulb Change: While access can be tight on some modern cars, changing a bulb is typically a simple process of removing a cover, twisting out the old bulb, and inserting the new one.
Knowing Your Limits: When to Put Down the Wrench and Call a Pro
A crucial part of being a smart DIY mechanic is knowing when a job is beyond your skill level, tool collection, or safety comfort zone. Pushing beyond your limits can lead to incomplete repairs, damage to the vehicle, or personal injury.
You should always defer to a professional for:
- Major Safety Systems: Any work on airbags, seatbelt pretensioners, or the anti-lock braking system (ABS) should be left to certified technicians.
- Internal Engine or Transmission Work: These are highly complex jobs that require specialized knowledge and tools.
- Air Conditioning Systems: Automotive AC systems are under high pressure and contain refrigerants that are hazardous and require special equipment to handle legally and safely.
- Jobs Requiring Expensive Specialty Tools: Tasks like pressing wheel bearings or comprehensive suspension alignment are not practical for the home mechanic.
- If You’re Unsure: If at any point you feel overwhelmed or uncertain about a step, it is always wiser to stop and consult a professional. There is no shame in ensuring the job is done right.
Frequently Asked Questions About Car Repair
Where can I find free step by step car repair instructions?
Free instructions are widely available on platforms like YouTube and in vehicle-specific online forums. While these can be excellent resources, always cross-reference information from multiple sources to ensure accuracy for your car’s make and model.
Are online car repair instructions trustworthy?
Trustworthiness varies. Instructions from reputable sources like factory service manuals or established repair sites are highly reliable. User-generated content, like videos or forum posts, should be vetted by checking comments and comparing with other guides.
What is the most important first step in any car repair?
The most critical first step is accurate diagnosis. Replacing parts without confirming the root cause of the problem can waste time and money and may not solve the underlying issue.
How can a beginner effectively follow step by step car repair instructions?
A beginner should read the entire procedure before starting, lay out all tools and parts, and work slowly and methodically. Taking photos during disassembly is an excellent way to remember how components fit back together.
What basic tools are needed to follow most car repair instructions?
A basic toolkit should include a good socket and ratchet set, a set of combination wrenches, various screwdrivers, and pliers. Essential safety gear like jack stands, wheel chocks, and safety glasses are also non-negotiable.
Is it cheaper to follow DIY repair instructions or go to a mechanic?
Performing your own repairs can significantly reduce expenses by eliminating labor charges. However, it’s important to factor in the investment in tools and the risk of making a mistake that could lead to a more complex repair.
Conclusion
Successfully using step by step car repair instructions hinges on proper diagnosis, prioritizing safety, and using reliable, vehicle-specific guides. By starting with simple jobs and understanding your limits, you can build confidence, save money, and gain a valuable understanding of your vehicle. This methodical approach transforms car maintenance from a daunting task into an achievable and rewarding skill. Before tackling your next project, take the time to research thoroughly and ensure you have the right tools for a safe and successful repair.
{“@context”:”https://schema.org”,”@type”:”Article”,”headline”:”Your Ultimate Guide to Step by Step Car Repair Instructions”,”mainEntityOfPage”:”https://autofixnotes.com/?p=1139″,”datePublished”:”2025-12-16T05:23:14+00:00″,”dateModified”:”2025-12-16T05:23:14+00:00″}