
Dents on your car can be annoying. You see them every time you walk to your vehicle, and fixing them at a shop is often expensive. The good news is, with some patience and the right tools, many small dents can be fixed at home.
DIY dent removal is now easier than ever—there are many techniques you can try, even if you have little experience with cars. Understanding these methods will help you save money and keep your car looking good.
But before you start, it’s important to know which dents you can repair yourself, which tools you’ll need, and how to avoid common mistakes. This article will walk you through the most popular DIY dent removal techniques, provide useful tips, and answer questions beginners often ask.
Understanding Car Dents
Not all dents are equal. Some are shallow and on flat surfaces, while others are deep or on a curve. Small, shallow dents—like those from a door bump or hail—are usually easiest to fix at home. Sharp or creased dents, especially those with damaged paint, may need professional help.
The material also matters. Most modern cars have body panels made from steel or aluminum. Aluminum is softer and harder to shape back, while steel is stronger but more difficult to pull. Always check your car’s material before starting.
Essential Tools For Diy Dent Removal
Having the right tools will make your work easier and safer. Here are the most common ones:
- Plunger: A simple tool, useful for small, shallow dents.
- Hair Dryer and Compressed Air: Good for temperature-based dent removal.
- Boiling Water: Often used for plastic bumpers.
- Dent Puller Kit: Includes glue, tabs, and pulling devices.
- Rubber Mallet and Wooden Dowels: Helps with pushing dents from the inside.
- Heat Gun: More powerful than a hair dryer.
- Body Filler and Sandpaper: Needed for final finishing if paint is damaged.
Most of these tools are affordable and found at hardware stores or online.

Credit: www.fortmillhyundai.com
Popular Diy Dent Removal Techniques
Let’s look at the most effective methods you can try at home. Each technique works best for certain dent types and locations.
1. The Plunger Method
This is one of the simplest ways to remove small, shallow dents—especially on flat surfaces like doors or fenders.
How it works:
- Wet the plunger and the dented area.
- Place the plunger’s cup over the dent.
- Press and pull sharply, trying to pop the dent out.
Tips:
- Use a clean sink or toilet plunger (not the one you use for plumbing! ).
- This works best for dents no larger than a few inches across.
Non-obvious insight: Many beginners don’t push enough air out before pulling, which reduces suction. Press firmly to get a tight seal.
2. Hair Dryer And Compressed Air
This technique uses rapid temperature change to reshape the metal.
Steps:
- Heat the dent with a hair dryer on the highest setting for 2–3 minutes.
- Quickly spray compressed air (held upside down) on the heated dent.
- The sudden cooling can pop the dent out as the metal contracts.
Best for: Small, shallow dents on metal panels.
Practical tip: Move the hair dryer around to heat the area evenly.
3. Boiling Water For Plastic Bumpers
Plastic is flexible. You can reshape it with heat.
How to do it:
- Boil a pot of water.
- Pour the hot water over the dented area.
- Reach behind the bumper (if possible) and push the dent out from the inside.
Important: Wear gloves to avoid burns.
Extra insight: After pushing out, pour cold water over the area to help the plastic hold its new shape.
4. Dent Puller Kits
These are popular and found in most auto stores. They use glue to attach a pulling tab to the dent.
Steps:
- Clean the dented area.
- Apply hot glue to a pulling tab, stick it to the dent, and let it cool.
- Use the provided tool to pull the tab and dent outward.
- Remove the tab and glue residue.
Works for: Small to medium dents.
Common mistake: Rushing the glue curing process. Wait for it to cool fully before pulling.
5. Using A Rubber Mallet And Wooden Dowels
If you can reach the back of the panel, this method works well.
How:
- Remove interior panels if necessary.
- Place a wooden dowel against the back of the dent.
- Tap gently with a rubber mallet to push the dent out.
Tip: Work slowly and check your progress often.
6. The Heat Gun Method
A heat gun is stronger than a hair dryer and heats faster.
How to use:
- Set the heat gun to low or medium.
- Move it over the dent for 1–2 minutes.
- Use compressed air for sudden cooling, or try pushing from the inside.
Warning: Too much heat can damage paint.
7. Body Filler And Sanding
If the dent is deep or the paint is broken, you may need to fill and sand.
Process:
- Sand the area around the dent.
- Mix and apply body filler, smoothing it with a spatula.
- Let it dry, then sand until smooth.
- Paint and finish as needed.
Note: This is a more advanced repair and can take several hours.
Comparing Diy Dent Removal Methods
It helps to see how these methods compare in ease, cost, and dent size suitability.
| Method | Best For | Skill Level | Estimated Cost | Dent Size |
|---|---|---|---|---|
| Plunger | Small shallow dents | Beginner | Low ($5–$10) | Up to 3 inches |
| Hair Dryer & Air | Shallow metal dents | Beginner | Low ($10–$20) | Up to 2 inches |
| Boiling Water | Plastic bumpers | Beginner | Low (free–$5) | Medium |
| Dent Puller Kit | Small/medium dents | Intermediate | Medium ($20–$40) | Up to 6 inches |
| Body Filler & Sanding | Deep/painted dents | Advanced | Medium ($20–$50) | Any size |
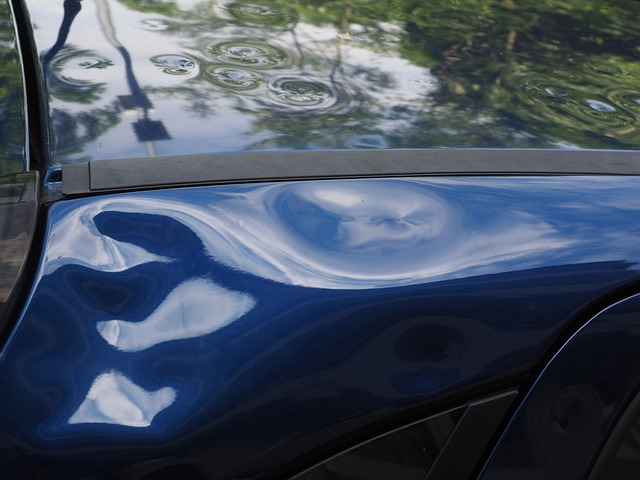
Credit: www.mazdaofsouthcharlotte.com
When To Avoid Diy Dent Removal
Some dents are not suitable for home repair. These include:
- Dents with sharp creases: Hard to fix without professional tools.
- Dents on body lines or edges: These areas are reinforced and difficult to shape.
- Large or deep dents: May require metal shrinking or painting.
- Dents with cracked or missing paint: DIY may worsen the damage.
If in doubt, get a quote from a body shop before trying to fix it yourself.
Safety Tips For Diy Dent Repair
Safety should always come first:
- Wear gloves when handling hot water, heat guns, or chemicals.
- Work in a well-ventilated area when using glue or body filler.
- Disconnect the car battery if removing interior panels with airbags.
- Avoid overheating paint with a heat gun to prevent peeling or bubbling.
- Use proper tools, not makeshift objects, to avoid scratching the car.
Common Mistakes And How To Avoid Them
It’s easy to make errors if you’re new to dent removal. Here’s what to watch out for:
- Using too much force: This can create new dents or stretch the metal.
- Not cleaning the area: Dirt can prevent glue or suction from working.
- Applying heat for too long: This risks paint damage.
- Skipping the test pull: Always start with a gentle pull and check progress.
- Forgetting to finish: If you use filler, sanding and painting are necessary for a smooth look.
Advanced Techniques And When To Call A Pro
Some dents need special tools and skills. Paintless dent repair (PDR) is a technique used by professionals that involves massaging the dent from behind. PDR tools are available, but they require training and practice.
If you’re not confident or the dent is in a difficult spot, consider a professional repair. This is especially true for newer cars with sensors or special paint finishes.
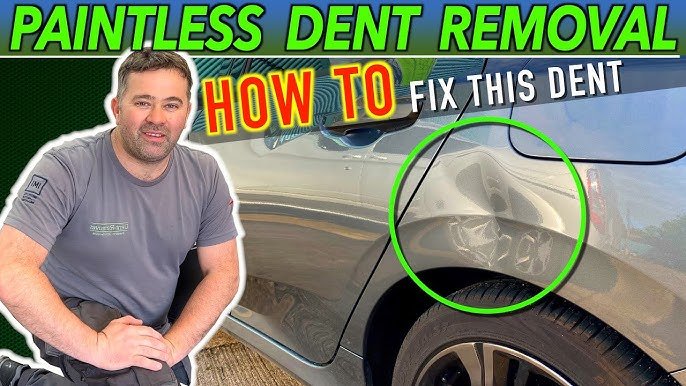
Credit: www.youtube.com
Example: Diy Dent Repair Step-by-step
Let’s walk through a simple example using the plunger method:
- Clean the dent area with soap and water.
- Wet the plunger and dent to create a seal.
- Place the plunger over the center of the dent.
- Push and pull quickly, repeating a few times.
- Check your progress after each pull.
- Wipe the area clean and inspect for improvement.
Many people are surprised how well this works for small dents.
Table: Diy Vs. Professional Dent Removal
Let’s compare at-home and shop-based repairs:
| Factor | DIY Dent Removal | Professional Service |
|---|---|---|
| Cost | $5–$50 | $80–$300+ |
| Time Needed | 15–90 minutes | 1–2 days |
| Skill Required | Low to medium | Professional |
| Finish Quality | Good to fair | Excellent |
| Warranty | None | Usually yes |
Real-world Tips For Better Results
- Always work slowly and check your progress often.
- For dents near sensors or cameras, avoid DIY—these parts are sensitive.
- Keep touch-up paint ready for small scratches.
- Test dent pullers on an old panel if you’re new to using them.
Extra insight: Car panels may have double layers or bracing behind them, making some dents impossible to reach from the back. If you can’t access the dent, stick to pull-from-the-outside methods.
Helpful Resources
For more technical details, you can read about Paintless Dent Repair on Wikipedia.
Frequently Asked Questions
What Size Dents Can I Fix Myself?
Most people can fix shallow dents up to 2–3 inches wide using the techniques above. Larger dents or those with sharp creases are much harder and usually need professional attention.
Will Diy Dent Removal Damage My Paint?
If you follow instructions and use proper tools, paint damage is rare. The risk is higher if you overheat the area or use too much force. Always test gently at first.
How Long Does A Typical Diy Repair Take?
Most basic dent repairs take 15–45 minutes. More advanced fixes, like using body filler, may take a few hours, including drying and sanding time.
Are Dent Puller Kits Worth Buying?
For small to medium dents, dent puller kits are effective and often cheaper than a body shop visit. Read instructions carefully and don’t rush the process.
When Should I Avoid Diy And Call A Professional?
Call a professional if the dent is deep, on a body line, has cracked paint, or is close to sensors or electronics. Professionals have better tools and can guarantee a factory-level finish.
DIY dent removal is a practical way to save money and learn more about your car. With the right tools and careful technique, you can restore your car’s look and gain the satisfaction of doing it yourself. Remember to start small, be patient, and know when to call a pro if things get tricky.