A heater core is a small but essential part of your vehicle’s heating and cooling system. When your car’s heater stops working well, or you notice a sweet smell inside your car, the heater core could be clogged or dirty. Flushing the heater core is one of the most effective ways to solve these problems and restore your car’s heating performance. This guide will walk you through everything you need to know about a heater core flush: why it matters, how to do it, what tools you need, and how to avoid common mistakes. Whether you’re a beginner or an experienced DIYer, you’ll find tips and insights to make the process smooth and safe.
What Is A Heater Core And Why Does It Matter?
The heater core is a small radiator-like device inside your car’s dashboard. It uses hot coolant from the engine to warm the air that blows into the cabin. When the heater core is working well, you get warm air quickly in winter. But over time, rust, scale, and debris can build up inside the heater core tubes. This blocks the flow of coolant and reduces heating.
A clogged heater core can cause several problems:
- Weak or no heat from vents
- Foggy windows that do not clear
- Coolant leaks inside the cabin
- Sweet smell inside the car (a sign of coolant)
Ignoring these signs can lead to bigger issues, like engine overheating or expensive repairs. Flushing the heater core is a simple, low-cost way to restore its function and improve your comfort and safety.
Signs You Need A Heater Core Flush
Many drivers do not realize their heater core is clogged until problems become severe. Here are the most common symptoms:
- Little or no heat from vents – Even when the engine is hot, the air stays cold.
- Sweet smell inside the car – Leaking coolant has a sweet, syrupy odor.
- Wet carpets or foggy windows – Coolant leaking from the core can soak the floor or fog up glass.
- Low coolant level – Unexplained drops in coolant might mean a leak in the heater core.
- Gurgling or sloshing sounds – Air or debris in the system can cause strange noises.
- Engine running hotter than normal – A clogged core restricts coolant flow, causing higher temperatures.
If you notice one or more of these signs, it’s a good idea to flush the heater core before considering more costly repairs.
Credit: www.holtsauto.com
Tools And Supplies Needed
Before starting a heater core flush, gather all the necessary tools and supplies. Having everything ready will save time and prevent frustration.
- Garden hose with a spray nozzle
- Two lengths of hose (5/8” or 3/4”, matching your heater core ports)
- Bucket or drain pan (to catch old coolant)
- Screwdrivers and pliers (for hose clamps)
- Work gloves and safety glasses
- Coolant (correct type for your vehicle)
- Funnel
- Rags and towels (to clean up spills)
- Distilled water (for flushing and refilling)
Tip: Some vehicles may need special adapters or tools. Check your owner’s manual for details.
How To Flush A Heater Core: Step-by-step
Flushing a heater core is not difficult, but it does require care and patience. Follow these steps closely for safe and effective results.
1. Let The Engine Cool Down
Never open the cooling system when the engine is hot. Hot coolant can spray out and cause burns. Wait at least 30 minutes after turning off the engine.
2. Locate The Heater Core Hoses
Open the hood and find the two hoses that go through the firewall to the heater core. They are usually near the back of the engine bay. Check your owner’s manual for their exact location.
3. Place A Drain Pan
Put a bucket or pan under the heater hoses to catch old coolant. Wear gloves and eye protection, as coolant is toxic.
4. Disconnect The Heater Core Hoses
Use pliers or a screwdriver to loosen the hose clamps. Carefully twist and pull the hoses off the heater core pipes. Some coolant will spill out—this is normal.
5. Attach Flush Hoses
Push your garden hose onto one heater core pipe and secure it with a clamp. Attach a second hose to the other pipe and direct it into the bucket.
6. Flush With Water
Turn on the water gently. Clean water will flow into one side of the heater core and push old coolant and debris out the other side. Keep flushing until the water coming out is clear.
7. Reverse The Flow
Switch the hoses: put the garden hose on the other pipe and repeat the process. This helps remove stubborn clogs by flushing in both directions.
8. Reconnect Hoses And Refill Coolant
Once the water runs clear, remove the flush hoses and reconnect the original heater hoses. Tighten the clamps securely. Top up the cooling system with the correct mix of coolant and distilled water.
9. Bleed The Cooling System
Start the engine and let it reach operating temperature. Turn the heater to max. Watch for leaks and check the coolant level. Add more coolant if needed.
10. Test The Heater
After the engine is warm, check the vents. You should feel hot air blowing. If not, there may still be a problem.
Comparison: Professional Vs. Diy Heater Core Flush
Some drivers prefer to let a mechanic handle this job. Here’s a quick comparison of doing it yourself versus hiring a pro.
| Factor | DIY Flush | Professional Service |
|---|---|---|
| Cost | $10–$30 (for supplies) | $80–$150 (labor and materials) |
| Time Required | 1–2 hours | 1 hour |
| Skill Level | Basic mechanical skills | Expertise not needed |
| Tools Needed | Common hand tools | Mechanic’s equipment |
| Guarantee | No guarantee | Work often guaranteed |
Non-obvious insight: Many shops use a special backflushing tool that works faster, but a careful DIY flush can be just as effective if you reverse the water flow during the process.
How Often Should You Flush The Heater Core?
Most vehicle manufacturers do not give a specific schedule for heater core flushing. However, as a general rule:
- Flush your heater core every 2–4 years or when you notice symptoms.
- If you live in a cold climate or use your heater often, flush more frequently.
- Always flush the entire cooling system (not just the heater core) at regular intervals, as recommended in your owner’s manual.
Neglecting coolant maintenance is a common cause of heater core and radiator problems.
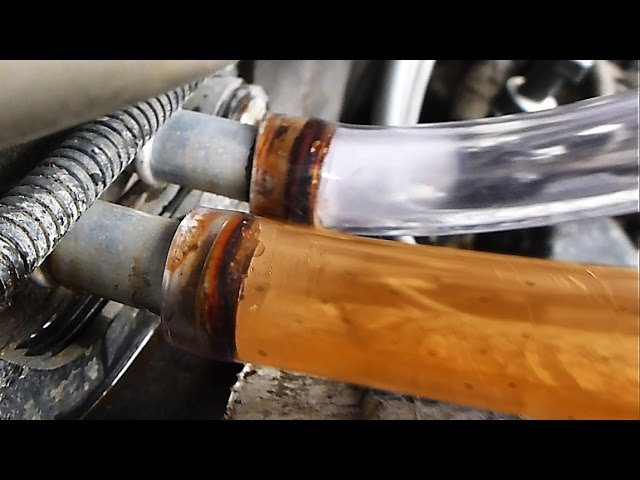
Credit: www.youtube.com
What Type Of Coolant Should You Use?
Using the correct coolant is critical for both performance and protection. Coolant types include:
| Coolant Type | Color | Lifespan | Compatible Vehicles |
|---|---|---|---|
| Inorganic Additive Technology (IAT) | Green | 2–3 years | Older cars (pre-2000) |
| Organic Acid Technology (OAT) | Orange/Red | 5 years | Modern GM, VW, Honda, etc. |
| Hybrid Organic Acid Technology (HOAT) | Yellow/Orange | 5 years | Ford, Chrysler, some imports |
Tip: Never mix different coolant types. Mixing can cause sludge and block the heater core again.
Common Mistakes And How To Avoid Them
Many DIYers make the same mistakes when flushing a heater core. Here’s how to avoid them:
- Flushing with the engine hot – Always let the car cool completely to prevent burns.
- Forgetting to bleed air – Air pockets in the cooling system can cause overheating or poor heat. Bleed the system after refilling.
- Using too much water pressure – High pressure can crack old heater cores. Use gentle flow.
- Not catching old coolant – Coolant is toxic to pets and the environment. Always collect and dispose of it properly.
- Mixing coolants – Only use the type recommended for your car.
Non-obvious insight: Some heater core clogs are caused by stop-leak products added to the cooling system. These can harden and block flow. Flushing may not remove all of this material, and sometimes replacement is the only solution.
When Flushing Isn’t Enough
If you flush the heater core and still have no heat, there could be other problems:
- The heater core might be leaking or corroded beyond repair.
- The heater control valve could be stuck or broken.
- The blend door (which controls hot/cold air) might not be working.
In these cases, you may need to remove and replace the heater core—a much bigger job that often requires dashboard removal.
Safety And Environmental Tips
Coolant is toxic to humans and animals. Take safety seriously:
- Always wear gloves and safety glasses.
- Keep coolant away from pets and children.
- Dispose of old coolant at an approved recycling center. Never pour it down the drain or on the ground.
For more on safe coolant disposal, check your local government website or read this EPA guide.

Credit: www.youtube.com
Practical Tips For A Better Heater Core Flush
- Always flush in both directions (forward and backward) for best results.
- Use distilled water for the final flush to avoid mineral deposits.
- Check all hoses and clamps for leaks before finishing.
- If your car is over 10 years old, inspect the heater core pipes for rust or cracks.
- Record the date and mileage after flushing for future reference.
Frequently Asked Questions
How Do I Know If My Heater Core Is Clogged?
Common signs are weak heat, foggy windows, a sweet smell inside the car, or wet carpets. If your heater blows cold even when the engine is warm, the core could be blocked.
Can I Drive With A Clogged Heater Core?
Yes, but it’s not recommended. A clogged heater core means poor cabin heat and can lead to engine overheating if coolant flow is restricted. It’s best to flush or repair it soon.
Is Heater Core Flushing Expensive?
DIY flushing costs $10–$30 for supplies. A professional flush usually costs $80–$150. If the heater core must be replaced, labor can be several hundred dollars.
Will Flushing The Heater Core Fix A Leak?
No. Flushing removes blockages but will not repair leaks. If coolant is leaking inside your car, the heater core probably needs replacement.
How Long Does A Heater Core Flush Take?
Allow about 1–2 hours for a full flush, including cooling, setup, and bleeding the system. Professionals may finish faster with special tools.
A clean and healthy heater core keeps you comfortable and your engine running safely. With the right tools and knowledge, a heater core flush is a smart, cost-effective DIY project. Don’t wait for winter to find out your heater doesn’t work—flush your heater core and enjoy warm drives all year.
