
Changing the differential fluid in your vehicle might sound complicated, but with the right steps, it’s a job many car owners can do at home. The differential is a vital part of the drivetrain, helping your wheels spin at different speeds as you turn.
Over time, the fluid inside collects dirt, metal particles, and loses its ability to protect the gears. Ignoring this maintenance can lead to expensive repairs, rough driving, or even total differential failure. In this guide, you’ll learn every step to change differential fluid, what tools you need, and tips to make the process smooth and safe.
Why Changing Differential Fluid Matters
The differential fluid is more than just lubrication. It reduces friction, cools down the gears, and carries away debris from normal wear. As the fluid ages, it becomes less effective. You might notice whining noises, vibrations, or even leaks if the fluid is overdue. Regularly changing the fluid helps extend the life of your differential and prevents costly breakdowns.
For most vehicles, manufacturers recommend changing the differential fluid every 30,000 to 60,000 miles, but check your owner’s manual for the exact interval. Off-road driving, towing, or carrying heavy loads can require more frequent changes.
Tools And Materials Needed
Before starting, gather all the tools and materials you’ll need. This not only saves time, but also avoids frustration if you discover you’re missing something halfway through.
Essential tools and materials:
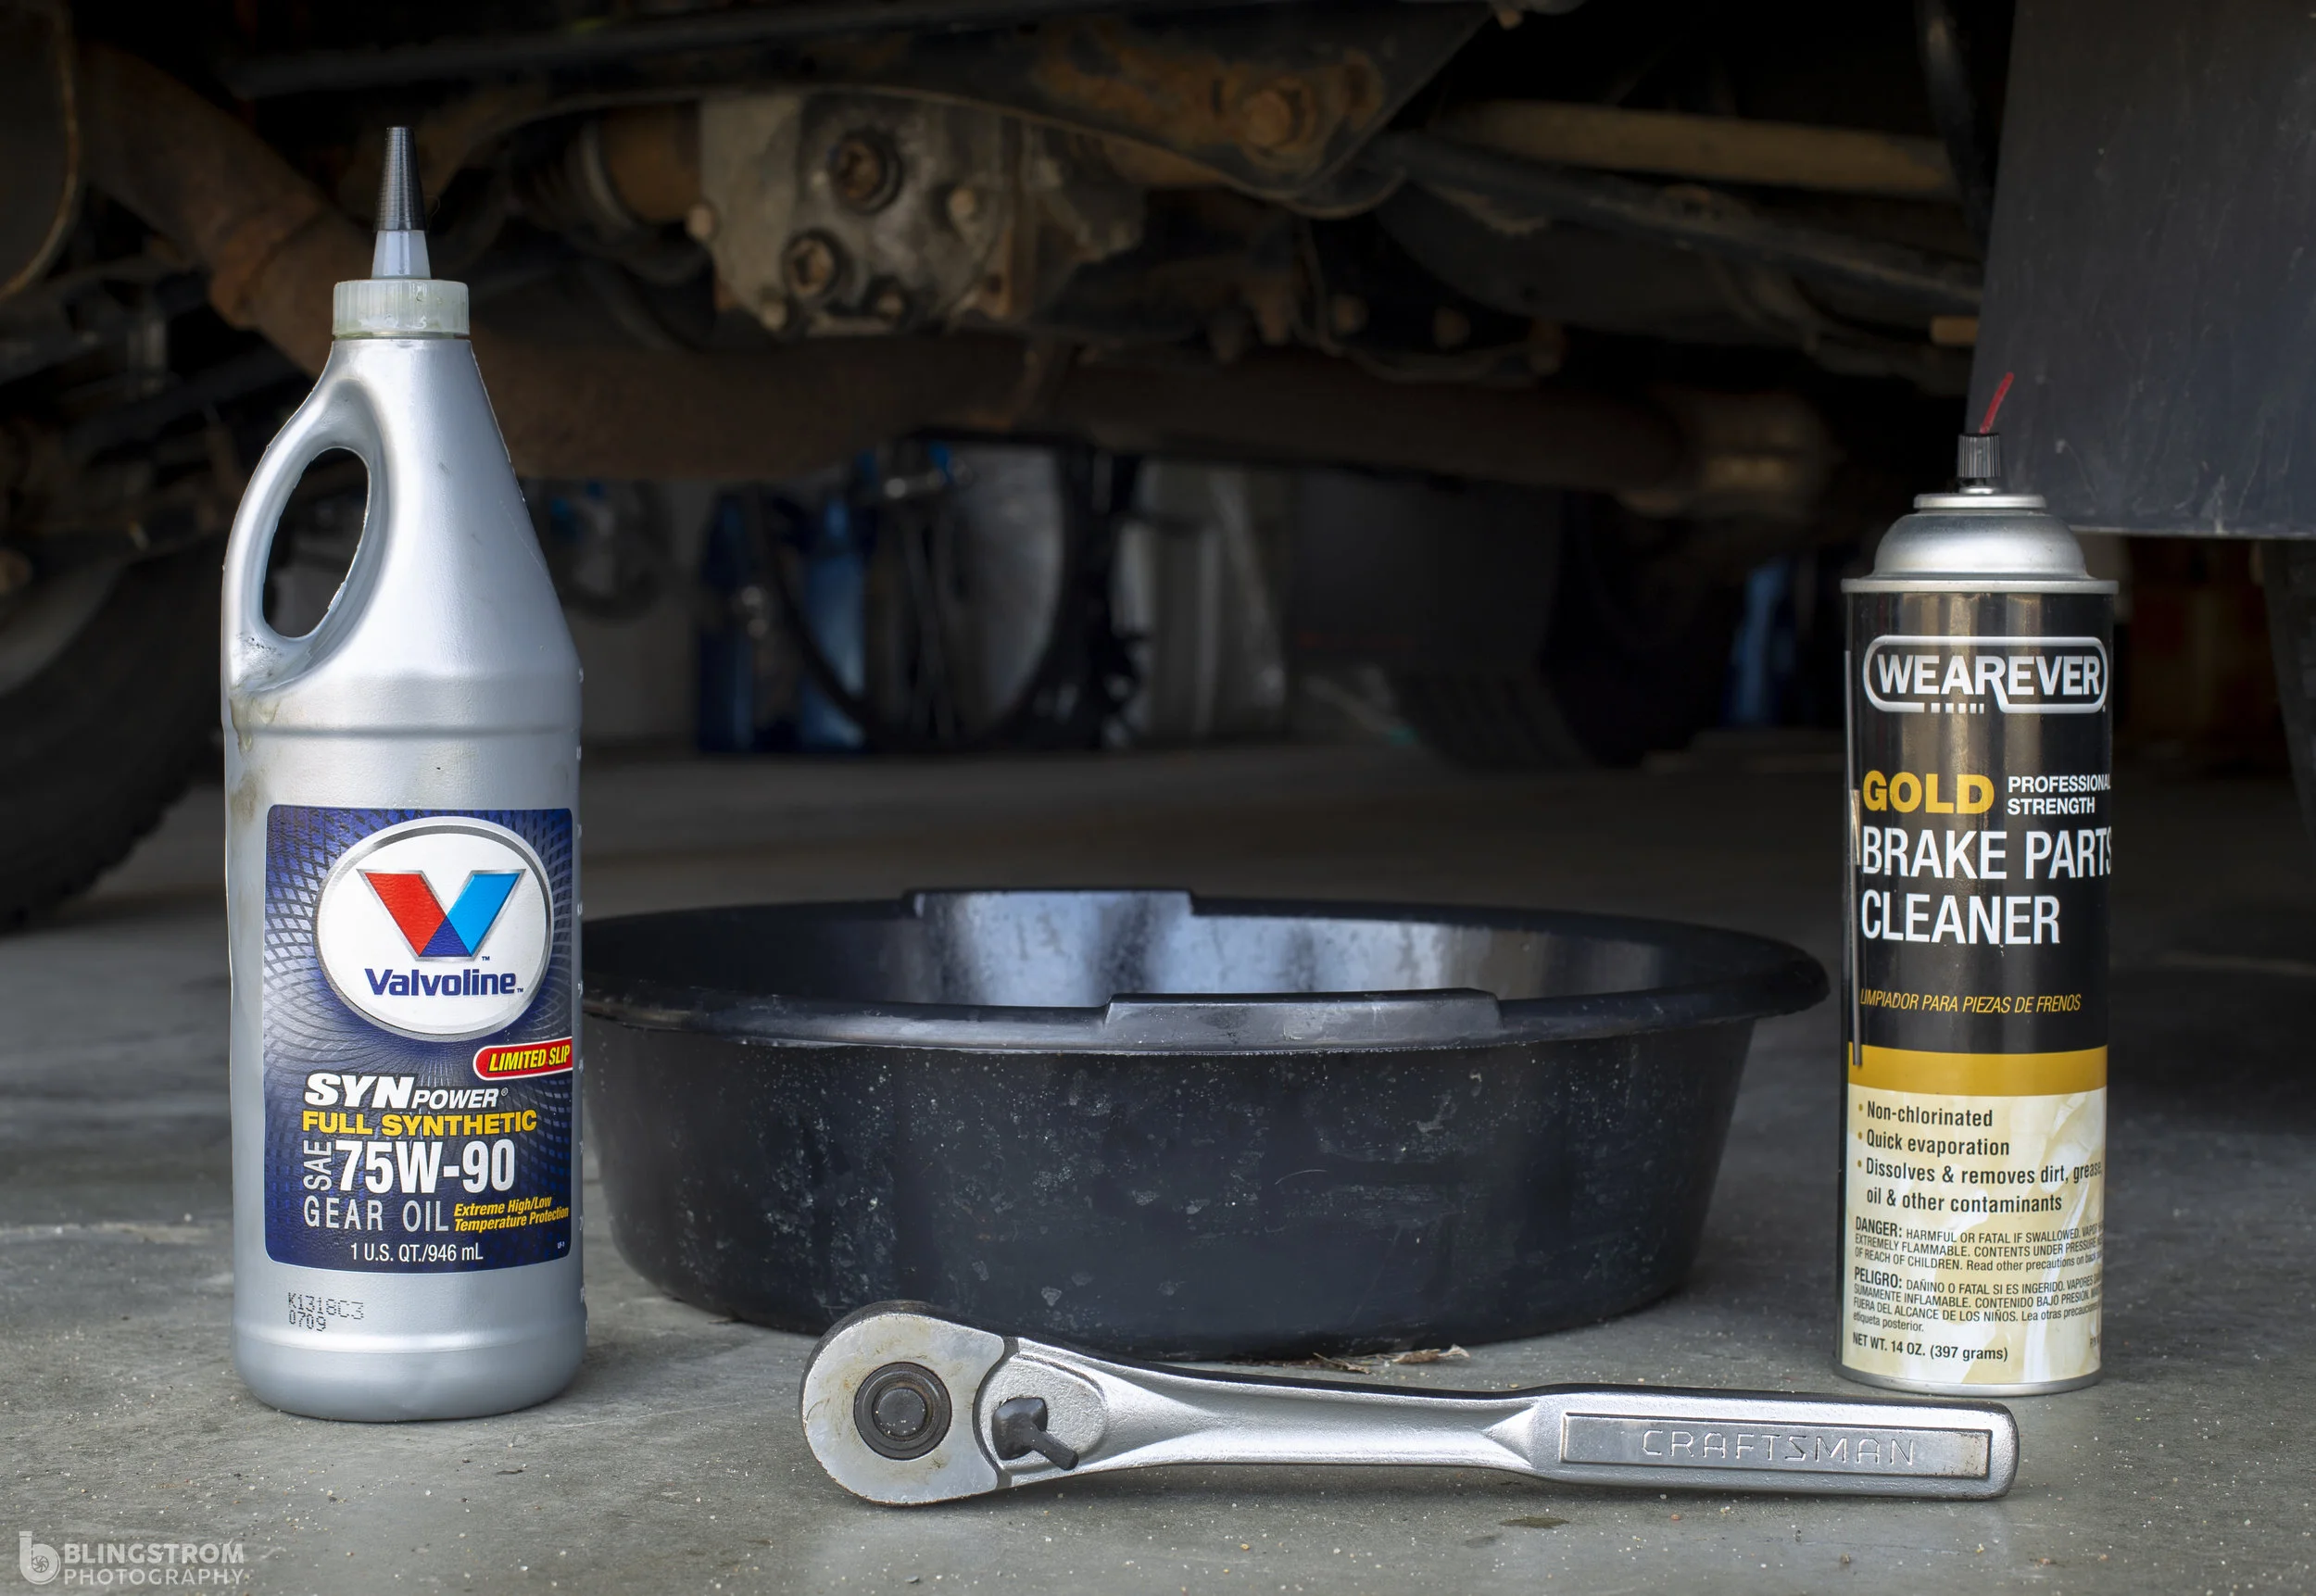
- Socket set and wrench
- Drain pan
- Fluid pump (hand pump or squeeze bottle with nozzle)
- Brake cleaner spray
- Gasket scraper or putty knife
- New gasket or gasket maker (RTV silicone)
- Rags or shop towels
- Jack and jack stands or ramps
- Torque wrench (for precise tightening)
- Eye protection and gloves
Fluids:
Make sure to buy the exact type and amount of differential fluid recommended for your vehicle. Using the wrong viscosity can damage the gears or cause noise.
Pro tip: Some differentials need special additives, especially limited-slip types. Check your manual or ask your dealer if you’re unsure.
Safety Precautions
Working under your vehicle involves risks. Take these steps to stay safe:
- Park on a flat, level surface.
- Set the parking brake and chock the wheels.
- Use jack stands or ramps—never rely on a jack alone.
- Wear eye protection and gloves to keep out chemicals and debris.
- Allow the vehicle to cool before starting; hot fluid can cause burns.
Step-by-step Guide To Changing Differential Fluid
1. Locate The Differential
Find the differential cover under your vehicle. For rear-wheel drive cars, it’s usually in the middle of the rear axle. Some front-wheel drive vehicles may have a transaxle instead. Double-check with your manual if you’re not sure.
2. Clean The Area
Dirt and debris can fall into the differential when you open it. Use a rag to wipe the cover and surrounding area. Spray with brake cleaner to remove oil and grime, then let it dry.
3. Remove The Fill Plug
Before draining, always loosen the fill plug first. If you can’t open it, you won’t be able to refill the fluid later. The fill plug is usually on the side of the differential.
- Use the correct socket or wrench.
- Turn counterclockwise to loosen.
- Set the plug aside in a safe place.
Insight: Some beginners try to drain the fluid before ensuring the fill plug opens. If the fill plug is stuck or damaged, you might not be able to refill the differential, leaving your car undrivable. Always open it first.
4. Position The Drain Pan
Place a large drain pan under the differential. If your differential has a drain plug (some do), remove it and let the fluid drain completely. For most vehicles, you’ll need to remove the cover to drain the fluid.
5. Remove The Differential Cover
Loosen and remove the bolts around the differential cover. Leave the top one or two bolts threaded in a few turns to prevent the cover from falling.
- Gently pry the cover with a gasket scraper or putty knife.
- Allow the old fluid to drain into the pan.
- Once drained, remove the remaining bolts and the cover.
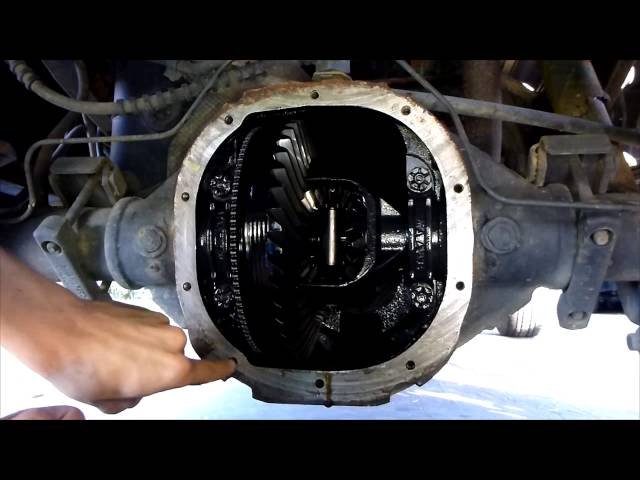
6. Inspect The Gears And Magnet
Check inside the differential for signs of metal shavings or damage. Most covers have a small magnet inside to catch metal particles. Wipe the magnet clean with a rag.
Extra tip: A small amount of fine metal dust is normal, but large chunks or shiny flakes could mean serious gear problems.
7. Clean The Mating Surfaces
Use a gasket scraper to remove the old gasket material and silicone from both the cover and the housing. Spray with brake cleaner and wipe clean.
- The surfaces must be free of oil and gasket material for a proper seal.
8. Install New Gasket Or Sealant
Apply a new gasket or a thin bead of RTV silicone, following the pattern in your manual. Wait a few minutes for silicone to “skin over” before installing the cover.
- Line up the bolt holes carefully.
- Hand-tighten the bolts first, then use a torque wrench to tighten to the recommended specification.
9. Refill With New Differential Fluid
Insert the fluid pump or squeeze bottle into the fill hole. Pump or squeeze fluid in slowly until it begins to trickle out of the fill hole—this means the differential is full.
- Replace the fill plug and tighten securely.
Common mistake: Overfilling can cause leaks or foaming. Underfilling can damage the gears. Always fill until the fluid just reaches the bottom of the fill hole.
10. Check For Leaks And Test Drive
Clean the outside of the differential. Lower the vehicle and take a short drive. Check for leaks around the cover and fill plug. If you notice any, retighten the bolts or plug as needed.
Comparing Differential Fluid Types
Choosing the right fluid is critical for performance and durability. Here’s a comparison of the main types:
| Fluid Type | Viscosity | Best For | Additives Needed? |
|---|---|---|---|
| Conventional Gear Oil | 80W-90 | Standard differentials | No |
| Synthetic Gear Oil | 75W-90, 75W-140 | High performance, towing | No |
| Limited Slip Gear Oil | 80W-90 with LS additive | Limited slip differentials | Yes |
Insight: Using synthetic fluid can improve cold-weather performance and last longer, but it’s usually more expensive. Always match the fluid to your vehicle’s requirements.
Signs Your Differential Fluid Needs Changing
Not sure if your vehicle needs a differential fluid change? Look for these warning signs:
- Whining, humming, or grinding noises from the axle area, especially when turning.
- Burnt odor coming from under the vehicle.
- Visible leaks around the differential cover or pinion seal.
- Vibration or shuddering during acceleration.
- Metal flakes in old fluid during inspection.
If you notice any of these, don’t delay the fluid change.

Credit: www.yourmechanic.com
Differential Fluid Change Intervals
How often should you change the differential fluid? Here’s a quick reference:
| Vehicle Use | Change Interval (Miles) |
|---|---|
| Normal Driving | 30,000 – 60,000 |
| Towing/Off-Road | 15,000 – 30,000 |
| High Performance | 10,000 – 20,000 |
Note: Always check your owner’s manual for the manufacturer’s recommendation.
Tips For A Successful Differential Fluid Change
- Warm up the vehicle with a short drive before starting. Warm fluid drains faster and carries away more debris.
- Use a new crush washer on the fill and drain plugs if your vehicle uses them.
- Don’t overtighten bolts—differential covers can warp or crack.
- Dispose of old fluid properly; most auto parts stores accept used oil.
- Keep a record of the service date and mileage for future reference.
Credit: www.blingstrom.com
Common Mistakes And How To Avoid Them
- Not cleaning the cover and housing: Dirt in the sealing area can cause leaks.
- Forgetting to check for leaks: Always inspect after your test drive.
- Using the wrong fluid: Double-check the part number and viscosity.
- Skipping the fill plug check: Never drain before making sure you can refill.
- Over- or under-tightening bolts: Use a torque wrench for best results.
Cost Comparison: Diy Vs. Professional Service
Changing differential fluid yourself can save money, but is it worth the effort? Here’s a quick comparison:
| Service Type | Average Cost | What’s Included |
|---|---|---|
| DIY | $30 – $70 | Fluid, gasket/sealant, tools (one-time cost for tools) |
| Professional Shop | $100 – $250 | Parts, labor, inspection |
Reality check: If you already have the tools, DIY is usually much cheaper. However, a professional shop inspects for other issues and guarantees their work.
When To See A Mechanic
While changing differential fluid is straightforward, some situations call for expert help:
- You notice large metal shavings or chunks in the old fluid.
- The cover is severely rusted or damaged.
- The fill or drain plug is stripped or stuck.
- You hear persistent noises after changing the fluid.
Never ignore signs of major wear or damage. Early diagnosis can save you from more expensive repairs later.
Useful Resources
For more details and visuals, check your vehicle’s service manual or trusted automotive guides. The Wikipedia Differential page offers a deep dive into how differentials work.
Credit: www.youtube.com
Frequently Asked Questions
How Do I Know What Type Of Differential Fluid My Car Needs?
Always check your owner’s manual for the exact fluid specification. If you can’t find it, ask your dealer or a trusted mechanic. Using the wrong type can damage the differential.
Can I Reuse The Old Gasket When Changing The Differential Fluid?
It’s not recommended. Old gaskets often tear or lose their sealing ability. Always use a new gasket or apply fresh RTV silicone for a leak-free seal.
How Long Does It Take To Change Differential Fluid?
For most DIYers, the process takes about 1-2 hours. If the cover is rusted or the bolts are stubborn, it might take longer.
What Happens If I Overfill The Differential?
Overfilling can cause foaming, leaks, and increased pressure. Always fill until the fluid just reaches the bottom of the fill hole—no more.
Is It Safe To Drive With Old Differential Fluid?
Driving with old, dirty fluid increases wear and risk of failure. If you hear noises, smell burning, or see leaks, change the fluid as soon as possible.
Changing your differential fluid is a smart way to protect your vehicle and avoid costly repairs. With the right tools, patience, and knowledge, you can handle this task yourself—and keep your car running smoothly for years to come.