
Adjusting your headlights might sound simple, but it’s a task many drivers overlook—often until they’re caught by surprise in a rainstorm or driving on a dark, winding road. Poorly aimed headlights can make it difficult to see hazards, blind other drivers, or even get you a ticket during a routine inspection.
If you’ve ever wondered why road signs seem too bright or you find yourself squinting at night, your headlights may need adjustment. Let’s explore how to adjust your headlights the right way, step by step, and learn why it’s more important than most people think.
Why Headlight Adjustment Matters
Aiming your headlights correctly is not just about convenience. Proper adjustment means better road visibility for you and less glare for others. According to the National Highway Traffic Safety Administration (NHTSA), about 50% of traffic accidents occur at night, even though only a quarter of all driving happens after dark. One overlooked cause is misaligned headlights, which limit your reaction time.
When headlights point too high, you may blind oncoming drivers. Too low, and you won’t see obstacles ahead. Aiming them left or right can send your beam into ditches or sidewalks. Factory settings can shift from rough roads, accidents, or even changing a bulb.
If your car feels safe but you still have trouble seeing at night, headlight alignment could be the missing piece.
What You Need Before You Start
Before you get started, gather these essential tools:
- Owner’s manual (for specific instructions)
- Measuring tape (at least 25 feet)
- Masking tape or painter’s tape
- Phillips or flathead screwdriver (depends on your car)
- Level surface (garage floor or parking lot)
- Blank wall (garage door or building wall)
- Pen and notepad (for notes or marks)
Most cars allow manual adjustment, but some newer models require special tools or dealer software. Always check your manual to avoid damaging the adjustment screws or the headlight assembly.
Preparing Your Vehicle For Adjustment
To get accurate results, follow these setup steps:
- Check tire pressure. Inflate all tires to the recommended pressure. Uneven tires can tilt your car and throw off the headlight angle.
- Remove heavy loads. Take out extra cargo or passengers. Adjust with only a half-full gas tank for a typical road load.
- Check headlight condition. Clean the lenses—dirt or fogging can change the light pattern.
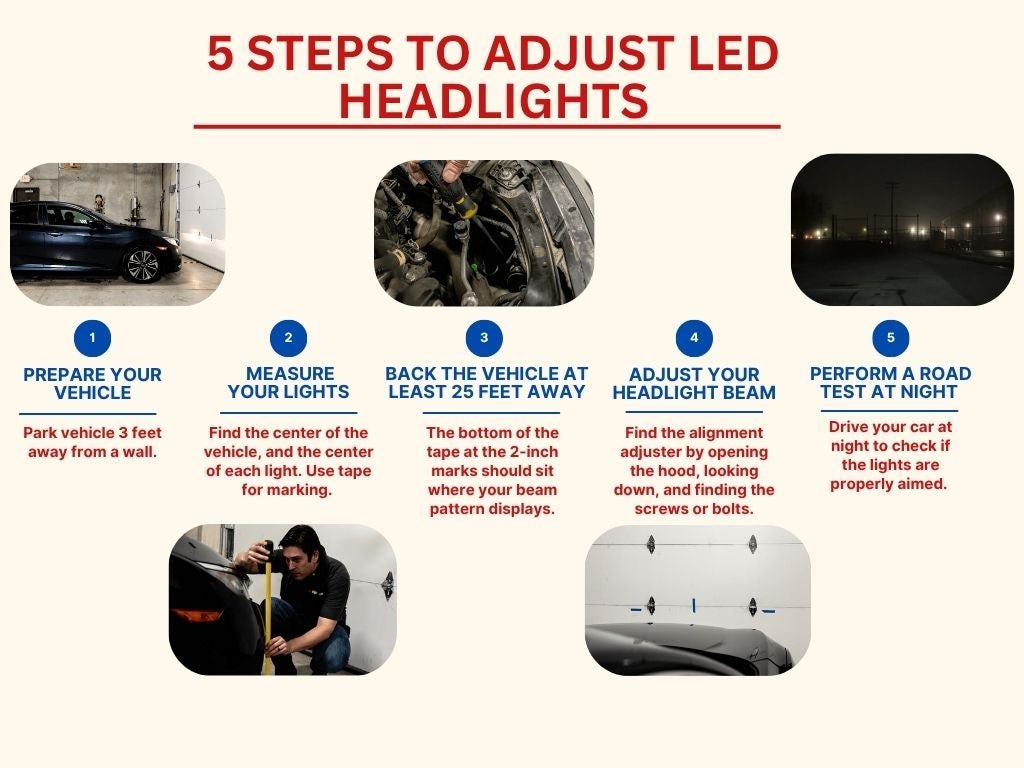
- Find a flat surface. Park your car on level ground, facing a flat wall about 25 feet away. This distance is standard for most headlight checks.
- Bounce the car. Push down on each corner to settle the suspension.
- Turn on headlights. Set them to low beam. Turn off automatic leveling systems if equipped.
Many people skip these steps, but even small details—like a heavy toolbox in the trunk—can change your results.
Measuring And Marking The Headlight Aim
This is where precision matters. Here’s how to set up your aiming marks:
- Measure height to center of headlights. Place the measuring tape on the ground and measure up to the center of each headlight bulb.
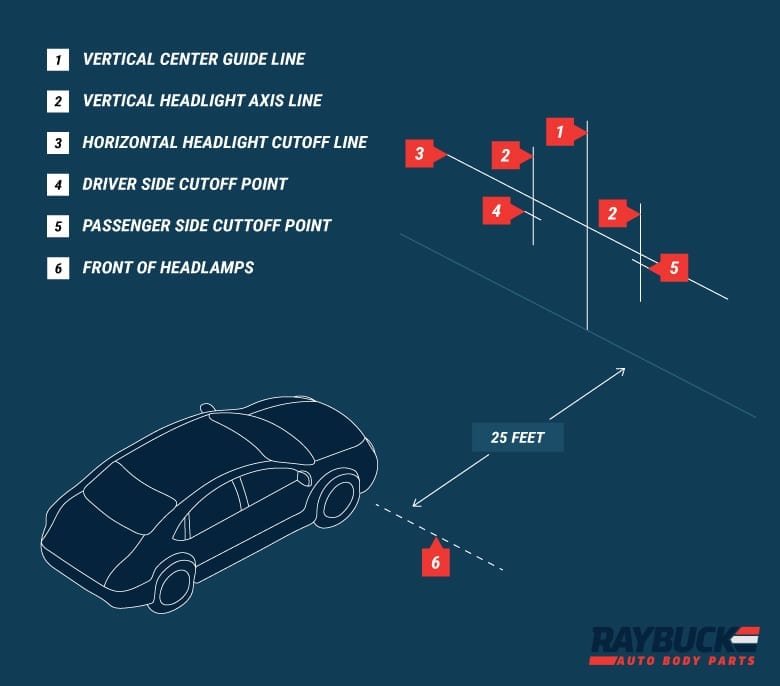
- Mark the wall. Use masking tape to make a horizontal line on the wall at the same height as your headlights. This will be your reference line.
- Mark the vertical center. Find the center line for each headlight by measuring from the ground out and marking the wall with vertical tape lines.
- Back up the car. Move your car straight back 25 feet (about 7.6 meters), keeping it perpendicular to the wall.
If your car manual lists a different distance, always follow that recommendation instead.
Adjusting The Headlights
With everything set, you’re ready to adjust the aim:
Locating The Adjustment Screws
Most cars have two adjustment screws per headlight:
- Vertical screw: Moves the beam up or down.
- Horizontal screw: Moves the beam left or right.
You’ll usually find these screws behind the headlight housing or on top, sometimes under a plastic cap. If you can’t see them, check your manual.
Step-by-step Adjustment
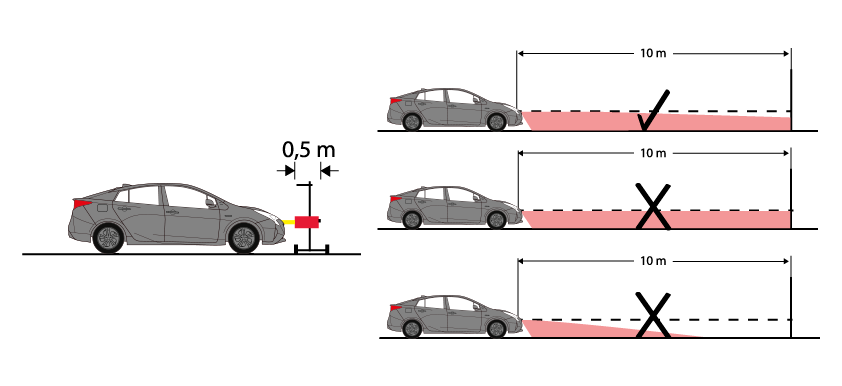
- Vertical adjustment: Shine the low beams on the wall. The top edge of the most intense part of the beam should hit about 2 to 4 inches below the horizontal tape line. This prevents blinding other drivers.
- Horizontal adjustment: The beam’s brightest center should line up with the vertical tape mark for each headlight. If the beam drifts left or right, adjust it so it centers on your tape line.
Use a screwdriver to turn the screws slowly. Clockwise usually raises or moves the beam right; counterclockwise does the opposite. Some cars have electric motors for adjustment—if so, follow on-screen instructions.
Example Adjustment Table
Here’s a simple reference for where your beam should fall:
| Vehicle Type | Beam Position (Vertical) | Distance from Wall |
|---|---|---|
| Passenger Car | 2–4 inches below headlight center | 25 feet |
| Truck/SUV | 3–5 inches below headlight center | 25 feet |
Checking The Results
After adjustment, inspect your results:
- Stand behind the car. Check that both beams are even and don’t cross.
- Drive a short distance. Test your headlights on a dark road. Look for consistent lighting, no dark spots, and no glare to oncoming traffic.
- Watch for signs of over- or under-adjustment. If road signs are blinding or your view is too short, revisit your settings.
Two common mistakes are forgetting to check both beams separately (some cars let you adjust only one at a time) and ignoring the effect of a full trunk or extra passengers.
Common Problems And Solutions
Even after careful adjustment, some drivers face stubborn issues:
- Flickering or dim light: Could be dirty lenses, old bulbs, or a failing electrical system. Clean or replace as needed.
- Beam pattern is fuzzy: Headlight lenses may be foggy from UV damage. Try a headlight restoration kit.
- Beams point in different directions: The headlight mount could be broken, or the car may have suspension issues. Have it checked by a mechanic.
- No effect when adjusting: The adjustment screws or mechanism might be stripped or stuck. Don’t force them—consult a professional.
Headlight Types And Special Cases
Not all headlights are the same. Modern cars use different systems, and you may need to adapt your process:
Halogen Vs. Hid Vs. Led
- Halogen: Most common, easy to adjust.
- HID (xenon): Brighter, with a sharp cutoff. Adjust carefully to avoid glare.
- LED: Compact, sometimes sealed units; may need dealer tools.
- Adaptive headlights: Adjust automatically based on steering or speed. Manual adjustment may not be possible.
Table: Headlight Type And Adjustment Needs
| Headlight Type | Manual Adjustment | Special Tools Needed |
|---|---|---|
| Halogen | Yes | No |
| HID (Xenon) | Yes | Sometimes |
| LED | Sometimes | Yes (Dealer) |
| Adaptive | No (Auto) | Yes (Dealer/Software) |
Knowing your car’s headlight type can save you wasted time and frustration.
Safety Tips And Best Practices
- Adjust regularly. Check your headlights every 6–12 months, especially after replacing a bulb or after a minor accident.
- Do not guess. Always use a wall and measuring tape for accuracy.
- Replace bulbs in pairs. A new bulb next to an old one can cause uneven light and misalignment.
- Avoid over-tightening. Forcing adjustment screws can break the assembly.
- Consider legal requirements. Some countries have strict laws for headlight aim. If you’re unsure, have a professional check your work.
What Beginners Often Miss
Many first-time adjusters make two classic mistakes:
- Ignoring the effect of suspension height: If your car sits higher or lower than stock—because of worn shocks or aftermarket springs—factory headlight settings won’t be correct.
- Not testing on the road: A perfect wall pattern doesn’t always mean safe night driving. Take a drive to check real-world visibility and adjust again if needed.
Credit: raybuck.com
When To Get Professional Help
If you have adaptive headlights, sealed LED units, or notice damage around your headlight housing, it’s best to let a professional handle the job. Most garages have tools like a beam setter or aiming device for pinpoint accuracy.
Also, if you struggle to see the adjustment screws or they’re rusted, forcing things can make repairs expensive. Mechanics can usually align your headlights in under 30 minutes.
Headlight Adjustment For Left-hand Vs. Right-hand Drive
Headlight aim is different depending on which side of the road you drive. Most cars in the US, for example, are set for right-hand traffic. If you import a car from another country, you may need to swap or adjust the headlights to avoid dazzling other drivers.
Some headlights have a switch or lever to change the beam pattern for travel. Check your manual if you plan to drive abroad.
Credit: www.championautoparts.com
Real-world Example
Let’s say you replaced a headlight after a fender bender. You notice other drivers flashing their lights at you. After following the steps above, you discover one beam is pointing too high and to the left. A quick adjustment brings both beams to the correct spot, and night driving feels safer and less stressful.
Recommended Further Reading
For more technical detail, visit the NHTSA Headlights Guide for government safety standards.
Credit: www.superbrightleds.com
Frequently Asked Questions
How Do I Know If My Headlights Are Misaligned?
Common signs include poor road visibility, seeing only a short distance ahead, or being flashed by oncoming drivers. If road signs seem overly bright or you notice an uneven pattern, it’s time to check alignment.
Can I Adjust Headlights By Myself Or Do I Need A Mechanic?
Most cars allow DIY adjustment with simple tools. However, for adaptive or LED headlights, or if the adjustment screws are damaged, a mechanic is recommended.
How Often Should I Check My Headlight Alignment?
Check every 6–12 months, after changing bulbs, or following any collision. Also check if you install new suspension or carry heavy loads regularly.
What Should I Do If My Headlights Are Still Dim After Adjustment?
Clean the lenses, check for old bulbs, or inspect the electrical system. Sometimes, headlight restoration kits or new bulbs are needed if adjustment alone doesn’t help.
Is There A Legal Requirement For Headlight Aim?
Yes. Most countries and US states have specific rules about headlight height and aim. Incorrect alignment can cause failed inspections or fines. Always check local laws or have a professional double-check your work.
Adjusting your headlights is a simple but powerful way to boost your safety and confidence on the road. With the right tools and a bit of patience, you can solve one of night driving’s biggest challenges—and see the road ahead more clearly than ever.