D jack stands to lift the front of your car. This gives better access to the drain plug, especially on low vehicles. Always use jack stands for safety—never rely on a jack alone. Chock the rear wheels to prevent the car from rolling.
Locate The Radiator And Overflow Tank
Open the hood and find the radiator. In most cars, it’s at the front, just behind the grille. The radiator cap is a round metal or plastic cap near the top. The overflow or reservoir tank is usually a small plastic container connected to the radiator by a hose. Take a moment to look for any leaks, cracks, or loose hoses. If you see major damage, fix it before flushing.
Step-by-step Guide To Flushing Your Radiator
1. Drain The Old Coolant
- Place your drain pan under the radiator drain plug (often called a petcock). Some cars have it on the bottom or side of the radiator. If you can’t find it, check your manual.
- Slowly loosen the radiator cap to release pressure. Then open the drain plug. Coolant will flow out quickly—make sure your pan is big enough to catch it all.
- Don’t forget to drain the overflow tank, if your car has one. You may need to disconnect a hose or remove the tank.
- Wait until the coolant has fully drained. This can take several minutes. Wipe up any spills to avoid slippery spots or pet poisoning.
What Beginners Miss
Some people forget to open the heater control inside the car (set the temperature to hot). This opens the heater core, letting coolant drain from that part too. If you skip this, old coolant may remain in the system, mixing with the new and reducing the benefits of the flush.
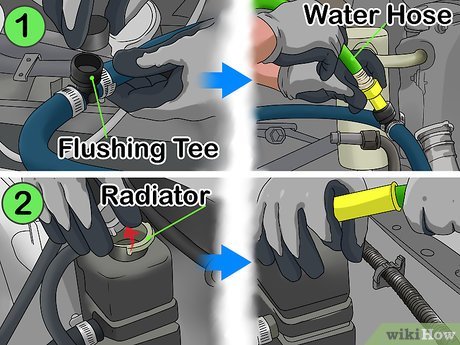
2. Flush With Water (and Flush Solution)
- Close the drain plug.
- Pour in distilled water until the radiator is full. If you’re using a flush solution, add it now and follow the instructions on the bottle. Never use tap water, as minerals can build up and cause blockages.
- Replace the radiator cap and start the engine. Let it run for about 10–15 minutes with the heater on full blast. This circulates the water and flush solution through the entire system.
- Turn off the engine and let it cool completely. Never remove the radiator cap while hot.
- Open the drain plug and let the water/flush mixture drain out. The liquid may look rusty or cloudy—this is normal.
Tip For A Deep Clean
If the drained water is still dirty, repeat the water flush process until it runs clear. This may take a couple of cycles, especially if you haven’t flushed your radiator in years.
3. Refill With Fresh Coolant
- Close the drain plug tightly, but don’t overtighten (plastic plugs can crack).
- Mix coolant and distilled water in the correct ratio (usually 50/50, but check your manual).
- Slowly pour the new mixture into the radiator using a funnel. Fill the overflow tank to the proper line.
- Some cars have a bleeder valve to remove trapped air. Open it if your car does, or gently squeeze the upper radiator hose to help air escape.
- Replace the radiator cap.
What Beginners Miss
Many people forget to “burp” the cooling system. After refilling, start the engine and let it run with the radiator cap off (if safe for your car; check the manual). Watch for air bubbles escaping. Once the bubbles stop, top off the coolant as needed.
Trapped air can cause overheating or weak cabin heat.
4. Check For Leaks And Test Drive
- With the engine running, look under the car for leaks. Check around the drain plug, hoses, and radiator cap.
- Monitor the temperature gauge. It should stay in the normal range.
- After a short drive, recheck coolant levels. Some air may still escape, so add more coolant if needed.
How To Tell If Your Radiator Needs Flushing
Not sure if it’s time for a flush? Watch for these signs:
- Coolant looks rusty or brown instead of bright green, orange, or pink.
- Low coolant level even after topping up—could mean a leak or clog.
- Sweet smell from the engine bay (coolant leaking or burning).
- Engine runs hotter than normal or the temperature gauge creeps up.
- Heater doesn’t blow hot air—the heater core might be clogged.
- Visible debris or sludge in the overflow tank.
Ignoring these warnings can lead to breakdowns in the worst moments—like being stuck in traffic on a hot day. Regular flushes prevent costly damage and keep your car dependable.
Credit: www.wikihow.com
Common Mistakes To Avoid
Using The Wrong Coolant
Not all coolants are the same. Mixing types (like green and orange) can cause chemical reactions, creating sludge and blockages. Always check your owner’s manual or ask a parts store for the right type.
Skipping The Flush Solution
If your coolant is very dirty, a flush solution helps break down rust and deposits. Skipping this step may leave behind harmful debris, reducing the effectiveness of new coolant.
Not Disposing Of Old Coolant Properly
Coolant is poisonous to pets and wildlife. Never pour it down the drain, onto the ground, or into storm sewers. Store it in a sealed container and take it to a recycling center or auto parts store that accepts hazardous waste.
Many local governments have disposal guidelines—check your city’s website for details.
Forgetting To Check For Leaks
After flushing, always inspect for leaks. Even a small drip can drain coolant over time and cause overheating. Tighten connections as needed, but avoid over-tightening plastic parts.
Not Burping The System
As mentioned before, trapped air can cause overheating or heater problems. Always run the engine and watch for air bubbles after refilling.
Advanced Tips For Best Results
Use A Cooling System Pressure Tester
A pressure tester can help you find leaks before they become serious. It’s a handy tool for anyone who does their own car maintenance. You can rent one from many auto parts stores.
Consider A Thermostat Replacement
If your car overheats often or the heater blows cold, the thermostat could be stuck. Replacing it during a flush can prevent future trouble.
Check The Radiator Cap
A weak radiator cap may not hold pressure, causing coolant to boil over. Caps are cheap and easy to replace, so inspect yours for cracks or a worn-out gasket.
Test The Coolant’s Freeze And Boil Protection
Use a coolant tester (hydrometer or refractometer) to check if your mixture protects against freezing and boiling at the temperatures you expect.
Flush More Often In Tough Conditions
If you drive in extreme heat, cold, or mountainous areas, your coolant breaks down faster. Short trips where the car doesn’t warm up fully can also create more moisture and corrosion. Adjust your flush schedule for these conditions.
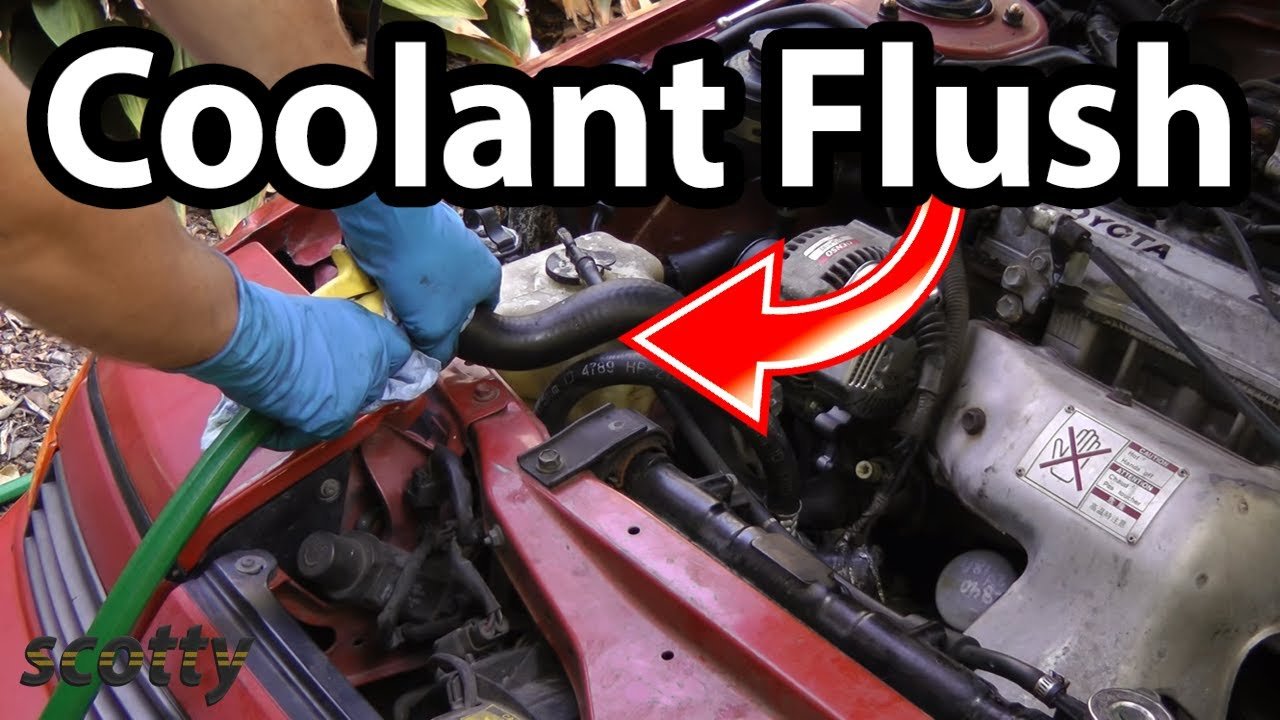
Credit: www.youtube.com
What If Something Goes Wrong?
If You Spill Coolant
Clean up immediately with water and towels. Coolant is slippery and dangerous for pets. Sprinkle baking soda or kitty litter to absorb large spills, then sweep up and dispose of the waste safely.
If The Engine Overheats After Flushing
- Stop driving right away.
- Check coolant levels once the engine cools.
- Look for leaks or loose hoses.
- If the temperature stays high, you may have an air pocket or another problem. Bleed the system again, and if that doesn’t help, consult a mechanic.
If You Mixed The Wrong Coolant
Drain the system and flush thoroughly with distilled water before refilling with the correct coolant. Some chemical reactions can cause blockages in just a few miles.
If You Lose The Drain Plug
Temporarily use a rubber expansion plug (available at parts stores), but order the correct replacement. Do not drive without sealing the radiator properly.
When To Call A Mechanic
While flushing a radiator is a straightforward job for most people, there are times when professional help makes sense:
- If you see oil in the coolant (milky or creamy appearance), you may have a blown head gasket—a serious problem.
- If the radiator is cracked or leaking badly, replacement is usually better than repair.
- If you feel unsure about any step, it’s safer to let a pro handle it.

Credit: www.familyhandyman.com
Final Thoughts
Flushing your radiator isn’t just maintenance—it’s a way to protect your car’s most expensive parts. With a few basic tools, some patience, and the steps above, you can do this job in your driveway and save money on repairs. Remember to check your owner’s manual for specifics, use quality coolant, and dispose of waste responsibly.
If you want to read more about coolant and car maintenance, the [U.S. Department of Energy’s guide on car care](https://www.energy.gov/energysaver/maintaining-your-vehicle) is a trustworthy resource with more tips.
Take care of your radiator, and your engine will take care of you—mile after mile.
