
Replacing an ignition coil can feel intimidating if you’ve never worked under a car’s hood before. Yet, with some patience and the right guidance, it’s a task many car owners can handle themselves. Understanding how to change your ignition coil not only saves on mechanic costs but also gives you more control over your vehicle’s health.
In this guide, you’ll learn exactly what an ignition coil does, how to know when it’s failing, what tools you’ll need, and step-by-step instructions for a safe and successful replacement. Along the way, you’ll pick up practical tips that most beginners miss, helping you avoid common mistakes and keep your car running smoothly.
What Is An Ignition Coil And Why Is It Important?
The ignition coil is a small but critical part of your engine’s ignition system. Its main job is to transform the low voltage from your car’s battery into the high voltage needed to create a spark at the spark plug. This spark ignites the fuel and air mixture in the engine, making your car run. Without a working ignition coil, your car might misfire, stall, or not start at all.
Most modern vehicles have one ignition coil per cylinder, but some older cars use a single coil for all cylinders. Knowing your car’s setup is important before starting the replacement process.
Signs Your Ignition Coil Needs Replacement
Before you start taking things apart, it’s important to spot the warning signs of a bad ignition coil. Here are some of the most common symptoms:
- Engine misfire – You may feel the car shake or notice uneven engine running.
- Check engine light – A faulty coil often triggers this warning.
- Hard starting – The car may struggle to start or take longer than usual.
- Decreased fuel efficiency – Bad coils make your engine work harder, using more fuel.
- Rough idling – The engine may vibrate or sound rough while stopped.
A simple scan with an OBD-II reader can confirm if the ignition coil is to blame. The code will usually be P0350 to P0362 for coil-related issues. If you see these signs, it’s time to prepare for a replacement.
Tools And Materials Needed
Having the right tools makes the job easier and safer. Here’s what you’ll need for most vehicles:
- Socket set (metric and standard sizes)
- Ratchet wrench
- Screwdriver set
- Torque wrench
- Dielectric grease (optional but helpful)
- Protective gloves
- Safety glasses
- New ignition coil (make sure it matches your car’s make and model)
Some cars may require special tools, like a Torx bit, so check your vehicle’s manual beforehand.
Preparing Your Vehicle For Replacement
Before you begin, ensure your car is parked on a flat surface with the engine off and cool. Working on a hot engine can cause burns or other injuries. It’s also a good idea to disconnect the negative battery terminal to prevent electrical shocks or accidental short circuits.
Safety First
Even a simple job like this requires attention to safety:
- Wear protective gloves and safety glasses.
- Keep tools and parts organized to avoid losing anything in the engine bay.
- Never force any parts; if something doesn’t come off easily, check for hidden bolts or clips.
Step-by-step Guide: How To Replace An Ignition Coil
Now, let’s walk through the process. These steps cover most modern vehicles with coil-on-plug systems. If your car uses a distributor, the process is similar but may have extra steps.
1. Locate The Ignition Coil
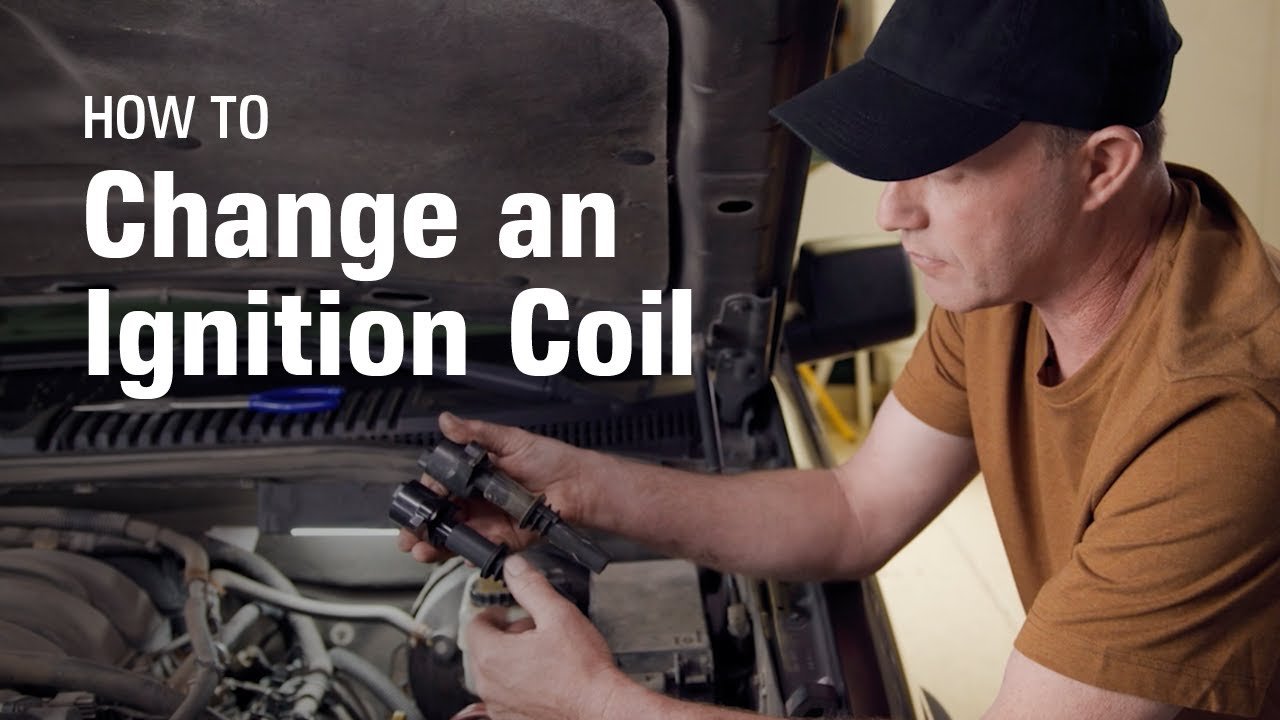
Open the hood and find the ignition coils. They are usually mounted directly on top of the engine, above each spark plug. In some vehicles, you might have to remove a plastic engine cover to see them.
2. Disconnect The Battery
Always start by disconnecting the negative battery cable. This step protects you and the car’s electronics from accidental shorts.
3. Remove The Electrical Connector
Find the wiring harness attached to the ignition coil. Press the clip and gently pull it off. Don’t pull on the wires themselves—only the connector.
4. Remove Mounting Bolts
Use your socket or Torx bit to unscrew the bolts holding the coil in place. Set the bolts aside in a safe spot.
5. Remove The Old Ignition Coil
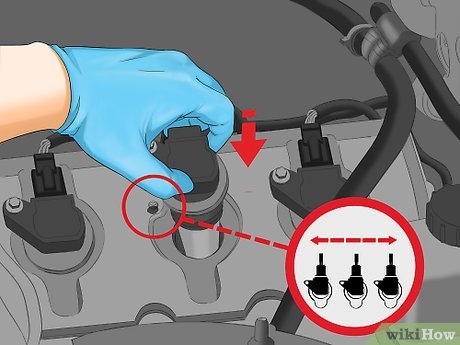
Pull the ignition coil straight up and out. If it feels stuck, gently twist it to break the seal, but avoid using too much force.
6. Prepare The New Ignition Coil
Before installing, compare the new coil to the old one. They should be identical in shape and size. If using dielectric grease, apply a small amount to the inside of the coil boot—this helps prevent moisture and makes future removal easier.
7. Install The New Ignition Coil
Slide the new coil into place, making sure it sits firmly on the spark plug. Reinstall the mounting bolts and tighten them to the manufacturer’s recommended torque (usually 7–9 ft-lbs, but check your manual).
8. Reconnect The Electrical Connector
Plug the wiring harness back into the new coil until it clicks. Double-check that it’s secure.
9. Reconnect The Battery
Reconnect the negative battery cable. Make sure all tools are removed from the engine bay.
10. Start The Engine
Start your car and let it idle. Listen for smooth engine sounds. If the check engine light stays off and the car runs well, you’ve done the job correctly.
Example: Typical Ignition Coil Replacement Time And Cost
On average, replacing one ignition coil takes about 20 to 40 minutes for a DIY job. Professional shops may charge for one hour per coil due to extra checks. The cost for parts ranges from $30 to $100 per coil, depending on your car’s make and model.
Below is a comparison of ignition coil replacement costs for three popular car models:
| Car Model | DIY Parts Cost (USD) | Professional Labor Cost (USD) | Total Shop Cost (USD) |
|---|---|---|---|
| Honda Accord (2012) | 40 | 80 | 120 |
| Toyota Camry (2015) | 45 | 90 | 135 |
| Ford F-150 (2017) | 70 | 110 | 180 |

Credit: shop.advanceautoparts.com
Extra Tips Most Beginners Miss
Many guides skip over these practical details. Here’s what you should know before you start:
- Label Each Connector: If you’re replacing multiple coils, label each electrical connector with tape so you don’t mix them up. Swapping connectors can cause engine misfires.
- Check Spark Plugs: A failed coil can sometimes damage or foul the spark plug below it. While the coil is out, inspect the spark plug and replace if needed.
- Inspect Coil Boots: The rubber boots on ignition coils can develop cracks or carbon tracks. If you see white lines or cracks, replace the boot or entire coil to avoid future problems.
- Avoid Overtightening: Too much force on the mounting bolts can crack the coil or the engine’s valve cover. Use a torque wrench if possible.
- Reset Engine Codes: After replacement, clear any engine codes with an OBD-II scanner. This helps the car’s computer “forget” the old error and monitor the new coil.
Common Mistakes To Avoid
- Skipping the battery disconnect: This can cause electrical shorts and damage sensitive electronics.
- Mixing up connectors: As mentioned, always keep track of which connector goes where.
- Not using dielectric grease: This small step prevents moisture and improves coil life.
- Ignoring the check engine light: If the light stays on after replacement, recheck your work. Sometimes the problem is a loose connector, not the new coil.
Credit: www.wikihow.com
When To Call A Professional
Some situations call for expert help:
- The coil is hidden under the intake manifold or deep inside the engine.
- The mounting bolts are rusted or stripped.
- You’re not comfortable with electrical connectors or engine work.
Professional mechanics have tools and experience for tricky jobs, and sometimes a small extra cost is worth the peace of mind.
Differences Between Single And Multi-coil Systems
Older cars often use a single ignition coil for all cylinders, connected through a distributor. Most modern cars use coil-on-plug systems, with one coil per spark plug. Here’s a quick comparison:
| System Type | Main Feature | Replacement Difficulty | Maintenance Frequency |
|---|---|---|---|
| Single Coil | One coil for all cylinders | Moderate | Every 60,000–100,000 miles |
| Coil-on-Plug | One coil per cylinder | Easy | As needed (per cylinder) |
Knowing your system helps you plan for future maintenance and spot issues early.
How To Test An Ignition Coil Before Replacing
If you’re not sure the coil is the problem, a simple test can help. Using a digital multimeter, measure the coil’s resistance. Your car’s manual should list the correct value. If the reading is far outside the range, the coil is bad.
- For most coils, the primary resistance (between two small terminals) should be 0.4–2 ohms.
- The secondary resistance (between the small and large terminals) should be 6,000–10,000 ohms.
If you’re unsure how to do this safely, ask a mechanic or check a reliable resource like Wikipedia.
Post-replacement Checks
After installing your new coil:
- Start the engine and listen for smooth operation.
- Test drive your car, noting if the previous issues are gone.
- Watch for any dashboard warning lights.
If problems return, double-check all steps and consider testing other ignition components.
Credit: www.youtube.com
Frequently Asked Questions
How Long Do Ignition Coils Last?
Most ignition coils last between 100,000 and 120,000 miles. However, heat, moisture, and oil leaks can shorten their lifespan. Regular inspection helps catch early signs of failure.
Can I Drive With A Bad Ignition Coil?
Driving with a faulty coil can damage your catalytic converter and other engine parts. It’s best to replace a bad coil as soon as possible to avoid costly repairs.
Do I Need To Replace All Ignition Coils At Once?
Not always. If only one coil fails, you can replace just that one. However, on high-mileage cars, replacing all coils can prevent future breakdowns and improve reliability.
What Causes Ignition Coils To Fail?
Common causes include age, heat, oil leaks, vibration, and electrical overload. Using the wrong spark plugs or poor-quality fuel can also stress the coils.
Is It Safe To Replace An Ignition Coil Myself?
Yes, if you follow safety steps and your car’s manual. Most DIYers can handle the job with basic tools. If the coil is hard to reach, consider professional help.
Replacing an ignition coil is a practical skill that can save you money and keep your car running at its best. With careful preparation, attention to detail, and the tips above, you can handle this task with confidence—even if it’s your first time.