Soldering car wiring can look intimidating if you’re new to working with vehicles. Yet, it’s a skill that can save you money, improve reliability, and help you fix electrical issues confidently. Many car owners try to twist wires together or use basic connectors, but these methods often fail over time.
Soldering creates a strong, long-lasting connection that resists vibration, moisture, and heat—common in any car’s environment. This guide will walk you through everything you need to know about how to solder car wiring, even if you’ve never held a soldering iron before.
Why Soldering Is Better Than Crimping Or Twisting
A lot of people wonder why they should bother with soldering at all. Isn’t twisting wires and wrapping them with tape good enough? In cars, the answer is usually no. Twisted or poorly crimped wires can come loose because of vibrations or heat under the hood.
Moisture can also get in, leading to corrosion and electrical problems.
Soldering melts a special metal (solder) into the wires, binding them together. This forms a solid electrical path and helps prevent loose connections. In fact, many car manufacturers use soldered joints in sensitive parts of the vehicle’s electrical system because it’s more reliable.
What You Need: Tools And Materials
Before you start, gather everything you’ll need. Using the right tools makes the process smoother and helps you avoid mistakes.
| Tool/Material | Purpose | Tips |
|---|---|---|
| Soldering iron (30–60W) | Heats and melts solder | Use one with a fine tip for car wiring |
| Solder (rosin core, 60/40 tin/lead or lead-free) | Bonds wires together | Rosin core helps clean the joint |
| Wire strippers | Removes insulation from wires | Choose adjustable for different wire sizes |
| Heat shrink tubing | Insulates soldered joint | Pick a size that fits snugly over the wire |
| Heat gun or lighter | Shrinks tubing over soldered area | Heat gun is safer and more even |
| Electrical tape | Extra insulation/protection | Don’t use instead of shrink tubing |
| Multimeter | Checks your work | Confirms solid connection |
| Helping hands/clamps | Holds wires steady | Makes soldering easier, especially solo |
It’s also smart to have safety glasses and work gloves. Car wiring often sits in tight spots, and protecting your eyes and hands is never a bad idea.
Preparing For Soldering
Preparation is key to a good result. Rushing or skipping steps can cause weak connections that may fail later.
Disconnect The Car Battery
Always disconnect the negative terminal of your car battery before working on wiring. This keeps you safe from electric shocks and protects sensitive electronics in the car.
Identify The Wires
Double-check you have the right wires. Use wiring diagrams if available. Mistakes here can cause serious problems, especially with airbag or computer wires.
Cut And Strip The Wires
Use wire cutters to remove any damaged sections. Strip about 1/2 inch (12 mm) of insulation from each end. Avoid nicking or cutting the wire strands—damaged strands can reduce current flow and weaken the connection.
Slide On Heat Shrink Tubing
Before you solder, cut a piece of heat shrink tubing about 1–2 inches (2.5–5 cm) long. Slide it onto one wire, well away from the soldering area. You can’t add it after soldering.
How To Solder Car Wiring: Step-by-step
Let’s go through the process in detail. Take your time, especially if you’re new to soldering.
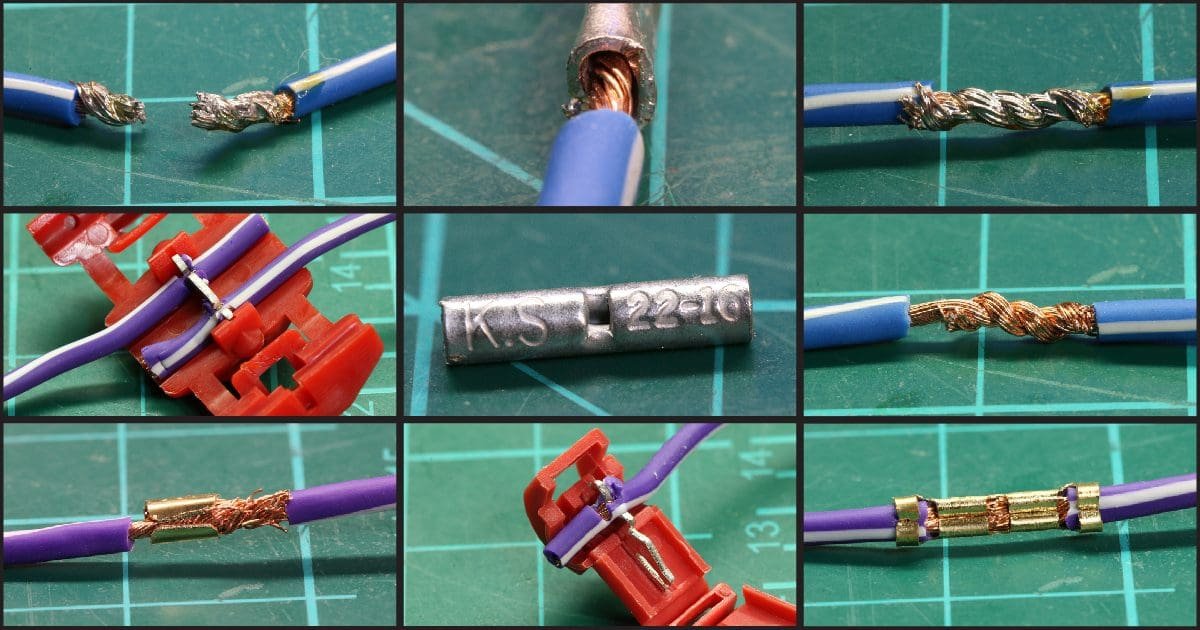
1. Twist The Wires Together
Line up the stripped ends and twist them tightly in a mechanical splice. There are several ways to do this, but for car wiring, a simple “Western Union” twist (wires wrapped around each other) is reliable. This holds the wires together while you solder.
2. Heat The Joint
Plug in your soldering iron and let it heat up fully. Hold the tip against the bottom of the twisted wires (not the solder) for a few seconds. This warms the copper so the solder flows smoothly.
Insight: Don’t try to melt solder directly onto the iron and drip it on the wires. This causes a weak, “cold” joint that can crack later.
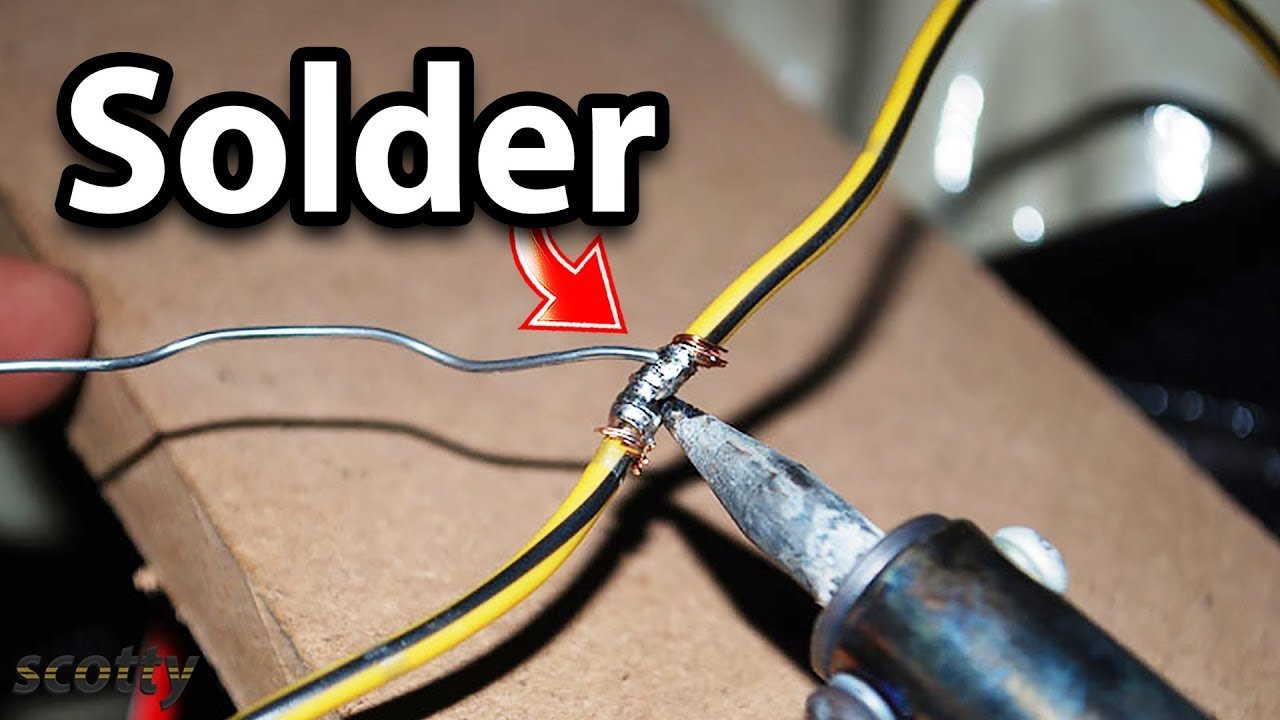
3. Apply Solder
Touch the solder to the heated wires (not the iron tip). As soon as the wires are hot enough, the solder will melt and flow into the strands. Use just enough to coat the joint—don’t glob it on. Remove the solder, then the iron.
Let the joint cool for at least 10 seconds. Don’t move the wires as they cool, or the connection may crack.
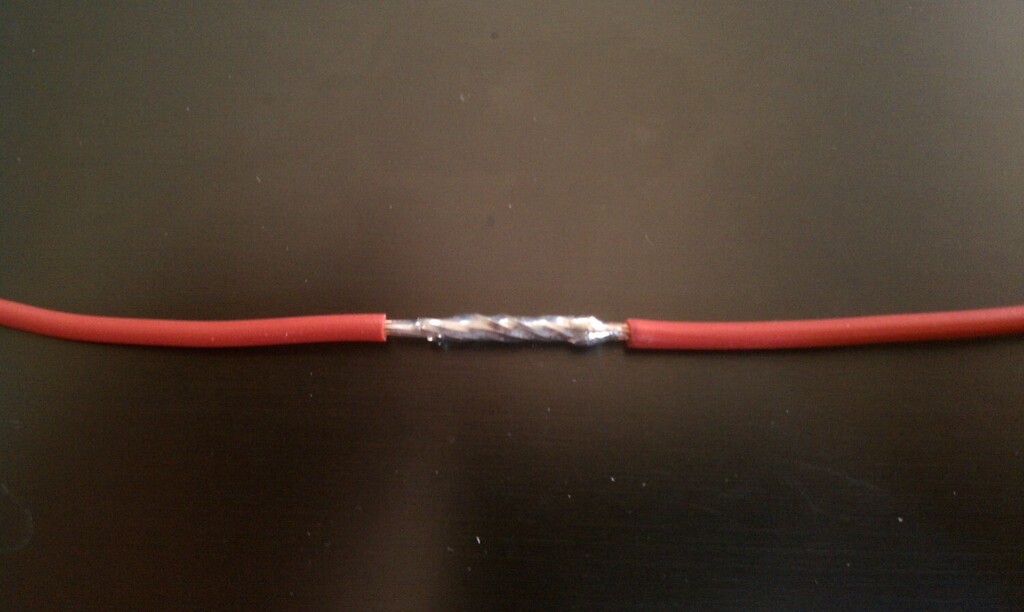
4. Inspect The Joint
A good solder joint looks shiny and smooth, with solder pulled into the wire strands. If it looks dull, grainy, or has blobs, it may be a cold joint. Reheat and add a little more solder if needed.
5. Slide And Shrink The Tubing
Once the joint is cool, slide the heat shrink tubing over the soldered area. Use a heat gun or lighter to shrink it until it fits snugly. If you use a lighter, keep it moving so you don’t burn the tubing.
Pro tip: Some tubing has glue inside for extra moisture protection—this is great for cars exposed to water.
6. Test The Connection
Reconnect the battery, then use a multimeter to test for continuity. Check that the device or circuit works as expected. This step catches problems before you close everything up.
Credit: www.bestcaraudio.com
Special Tips For Soldering In Cars
Car wiring isn’t always easy to reach. Here are some ways to get better results:
- Use a flexible extension cord for your soldering iron if you need to work outside the garage.
- Clean dirty wires with isopropyl alcohol before soldering. Grease or corrosion can ruin a joint.
- If working in cold weather, warm the wires with a heat gun before soldering. Cold wires take longer to heat and may cause poor results.
- In tight spaces, try a pencil-style soldering iron for better control.
- For thick wires (like battery cables), use a higher-wattage iron or a small torch, but be careful not to overheat insulation.
Common Mistakes And How To Avoid Them
Even experienced DIYers can make mistakes. Here are some to watch for:
| Mistake | Result | How to Avoid |
|---|---|---|
| Using too little heat | Cold, weak joint | Let iron heat fully, preheat wires |
| Melting insulation | Exposed copper, short circuit risk | Keep iron on wires, not on plastic |
| Not using heat shrink tubing | Wires short out, corrode | Always add tubing before soldering |
| Soldering live wires | Blown fuses, damaged electronics | Disconnect battery first |
| Overheating wires | Brittle wires, broken connections | Don’t hold iron on too long |
Choosing The Right Solder And Tools
Not all solder is created equal. For car wiring, choose rosin core solder—it contains flux that cleans the wires as you work. Avoid acid core solder (for plumbing), which can damage car wiring.
For most car wires (16 to 12 gauge), a 30–60 watt soldering iron is perfect. For thicker wires, you might need more power. Lead-based solder (60/40 tin/lead) is easier for beginners, but lead-free solder is safer and now more common.
Non-obvious tip: Some cheap solder contains impurities that make joints brittle. Buy from a trusted brand, even if it costs a little more.
When Not To Solder In Cars
Soldering is great for most repairs, but there are exceptions. Some modern cars have wires coated with special insulation or use aluminum wiring, which requires special skills and tools. If you’re working near airbags or critical safety systems, it’s best to leave repairs to a professional.
Also, avoid soldering connections that will carry a lot of current, like starter or alternator cables. These often use crimped terminals for safety.
Credit: www.youtube.com
Real-world Example: Fixing A Broken Tail Light Wire
Suppose your tail light isn’t working, and you find a broken wire in the trunk. Here’s how you’d fix it:
- Disconnect the battery.
- Cut out the damaged part of the wire.
- Strip 1/2 inch of insulation from both ends.
- Slide heat shrink tubing onto one side.
- Twist wires together.
- Heat with soldering iron, add solder until joint is coated.
- Let cool, slide tubing over, and shrink.
- Reconnect battery and test the tail light.
By following these steps, you get a reliable fix that should last for years.
Comparing Soldered Joints Vs. Other Methods
Here’s a quick look at how soldering compares to other common connection methods:
| Method | Strength | Vibration Resistance | Moisture Resistance | Longevity |
|---|---|---|---|---|
| Soldered Joint | High | High | High (with tubing) | 10+ years |
| Twisted and Taped | Low | Low | Low | Months to 1 year |
| Crimp Connector | Medium | Medium | Medium | 5–10 years |
As you can see, soldering is the best choice for long-term reliability in most car wiring repairs.
Credit: carfromjapan.com
Safety And Environmental Tips
- Always work in a well-ventilated area. Solder fumes can be harmful.
- Don’t eat or touch your face while soldering—wash your hands after.
- Dispose of old wiring and solder waste properly. Lead is harmful to the environment.
- If you’re unsure about a repair, ask for help. A small mistake with car wiring can cause bigger issues.
For further reading about soldering and electronics safety, visit the Soldering Wikipedia page.
Frequently Asked Questions
How Do I Know If My Solder Joint Is Good?
A good solder joint will look shiny, smooth, and completely cover the twisted wires. If it looks dull, cracked, or has gaps, reheat and add more solder. Test with a multimeter for electrical continuity to be sure.
Is Lead-free Solder Better For Car Wiring?
Lead-free solder is safer for health and the environment, but it melts at a higher temperature and can be harder for beginners. Both types work if used correctly. For small repairs, either is fine, but practice with lead-free solder if you plan to do more work.
Can I Solder Wires With The Car Battery Connected?
No. Always disconnect the battery before soldering. Soldering live wires can cause shorts, damage electronics, or even result in injury.
What If I Don’t Have Heat Shrink Tubing?
You can use electrical tape as a backup, but it’s not as reliable. Tape can unravel or let moisture in. Heat shrink tubing is much better for car wiring repairs.
Are There Wires I Shouldn’t Solder?
Yes. Avoid soldering high-current cables (like starter or alternator wires) and special wires for airbags or sensors. These often require special connectors or repair kits.
Soldering car wiring is a valuable skill for any car owner or DIYer. With the right tools, some patience, and careful technique, you can create repairs that are safer and longer-lasting than most shop fixes. Whether you’re upgrading your stereo or fixing a broken light, these steps will give you results you can trust.
