If your car engine is running rough, losing power, or using more fuel than usual, dirty fuel injectors could be the cause. Clean fuel injectors are essential for good performance, smooth idling, and lower emissions. Many drivers think cleaning fuel injectors is a job only for professionals. But with the right tools, a little patience, and some know-how, fuel injector cleaning DIY can be safe and effective.
This guide will walk you through why injector cleaning matters, signs your injectors need attention, tools and products you’ll need, step-by-step cleaning methods, safety tips, and common mistakes to avoid. With clear steps and real-world advice, you can restore your engine’s efficiency and save money on repairs.
Why Clean Fuel Injectors Matter
Fuel injectors are small nozzles that spray fuel into your engine’s cylinders. Over time, these tips can clog with carbon, varnish, or dirt from old fuel. When injectors clog, they spray less fuel or spray it unevenly. This leads to:
- Hard starting and rough idling
- Poor acceleration
- Reduced fuel economy
- Higher emissions
- Engine knocking or pinging
Regular cleaning helps maintain peak engine performance and can even extend your car’s life. Most experts recommend cleaning every 30,000 to 45,000 miles, or sooner if you use low-quality fuel or drive in dusty conditions.
Signs Your Fuel Injectors Need Cleaning
You don’t have to be a mechanic to spot dirty injectors. Watch for these common symptoms:
- Engine misfires – The car shakes or the engine skips while driving.
- Poor fuel economy – You fill up more often, but drive less.
- Loss of power – Slow acceleration or sluggish response.
- Rough idle – The engine sounds uneven or vibrates when stopped.
- Check engine light – Sometimes triggered by fuel-related issues.
- Hard starting – The engine cranks longer before starting.
If you notice one or more of these issues, it may be time for a DIY cleaning.
Tools And Supplies Needed
Doing a DIY fuel injector cleaning doesn’t require expensive equipment, but you will need a few basics:
- Fuel injector cleaning kit (with adapter hoses and canister)
- Fuel injector cleaner fluid (not just fuel additive)
- Basic hand tools (screwdrivers, wrenches)
- Safety goggles and gloves
- Rags and a catch pan (for spills)
- Owner’s manual (for fuel rail and fuse box locations)
Some kits connect directly to the fuel rail, while others work through the fuel tank. Choose one that matches your car’s make and model.
Here’s a quick comparison of popular cleaning methods:
| Method | DIY Difficulty | Effectiveness | Required Tools |
|---|---|---|---|
| Fuel Additive | Easy | Low to Medium | Additive bottle |
| Pressurized Cleaning Kit | Medium | High | Cleaning kit, hand tools |
| Manual Injector Removal | Advanced | Very High | Tools, new seals |
Step-by-step: Fuel Injector Cleaning Diy
There are two main ways to clean injectors yourself: using a fuel system cleaner additive or a pressurized injector cleaning kit. Let’s go through both.
Using A Fuel Injector Cleaner Additive
This is the simplest method and safe for beginners. It works best for minor build-up, not severe clogs.
- Choose a reputable cleaner – Look for brands like Chevron Techron, Gumout, or Lucas.
- Read your manual – Check tank size and product instructions.
- Pour the cleaner into the fuel tank – Add it before filling up with gas. This mixes the cleaner well.
- Drive normally – Use the whole tank of gas before refueling. The cleaner will gradually dissolve deposits.
- Repeat if needed – For best results, use every 3,000-5,000 miles.
While this method is easy, it may not fix serious clogging. Still, it’s good preventative maintenance.
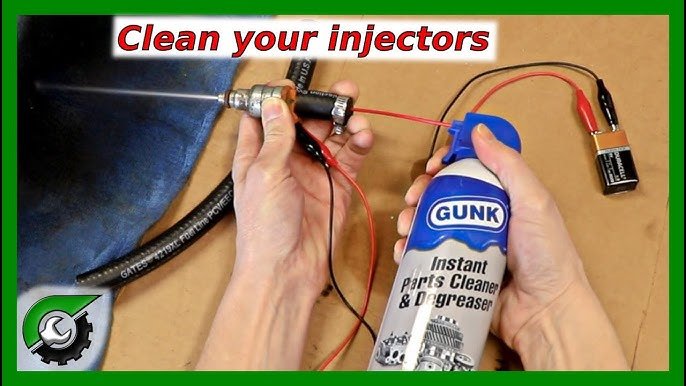
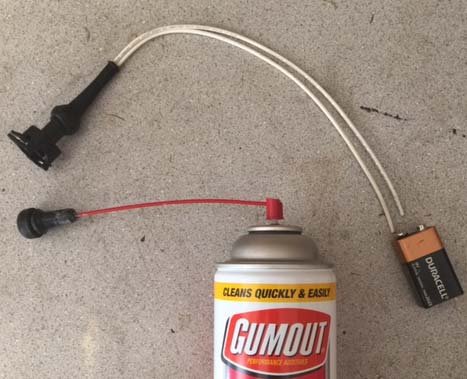
Using A Pressurized Fuel Injector Cleaning Kit
For deeper cleaning, you’ll need a cleaning kit that connects to your engine’s fuel rail. This delivers concentrated cleaner directly to the injectors.
Important: Work in a well-ventilated area and keep fire away. Gasoline and vapors are flammable.
Follow these steps:
- Relieve fuel system pressure – Locate the fuel pump fuse and remove it. Start the engine and let it run until it stalls. This prevents fuel spray.
- Disconnect the fuel rail – Use your manual to find and loosen the fuel rail or line.
- Connect the cleaning kit – Attach the kit’s hose to the fuel rail. Make sure the connection is tight.
- Add cleaner to the kit – Pour the special cleaning fluid into the canister.
- Start the engine – The engine will run on the cleaning fluid for about 10-15 minutes. Watch for leaks.
- Reconnect everything – Remove the kit, reattach the fuel line, and replace the fuse.
- Test drive – Take a short drive to check for smooth running.
This method is more effective than just adding cleaner to the tank, especially for older or high-mileage vehicles.
Manual Injector Removal And Cleaning
This is the most thorough method but also the most advanced. It involves removing the injectors from the engine, soaking and cleaning them, and sometimes replacing seals. Unless you have mechanical experience, it’s best left to professionals.
If you do try, follow your car’s service manual closely and use only recommended cleaners.
Credit: www.youtube.com
Safety Tips For Diy Injector Cleaning
Working with fuel involves risk. Follow these safety tips:
- Always work outdoors or in a well-ventilated garage.
- Wear safety goggles and gloves to protect your eyes and skin.
- Keep a fire extinguisher nearby.
- Do not smoke or use open flames near your workspace.
- Clean up spills immediately and dispose of rags safely.
- Double-check all connections before starting the engine.
Even experienced DIYers sometimes forget basic safety, so never rush the process.
Choosing The Right Fuel Injector Cleaner
Not all cleaners are created equal. Some contain stronger detergents or solvents. Here’s how to choose:
- Check for compatibility – Make sure the cleaner works for gasoline or diesel, as needed.
- Look for cleaning claims – Good products mention removing carbon, varnish, and gum.
- Avoid harsh chemicals that can harm seals or sensors.
- Read reviews and look for brand reputation.
Here’s a quick comparison of top fuel injector cleaner brands:
| Brand | Main Ingredient | Works With | Price (USD) |
|---|---|---|---|
| Chevron Techron | Polyetheramine (PEA) | Gasoline | 8-12 |
| Lucas Oil | Petroleum Distillates | Gasoline/Diesel | 6-10 |
| Gumout Regane | Polyetheramine (PEA) | Gasoline | 7-11 |
Insider tip: Products with PEA (polyetheramine) are often more effective for deep cleaning.
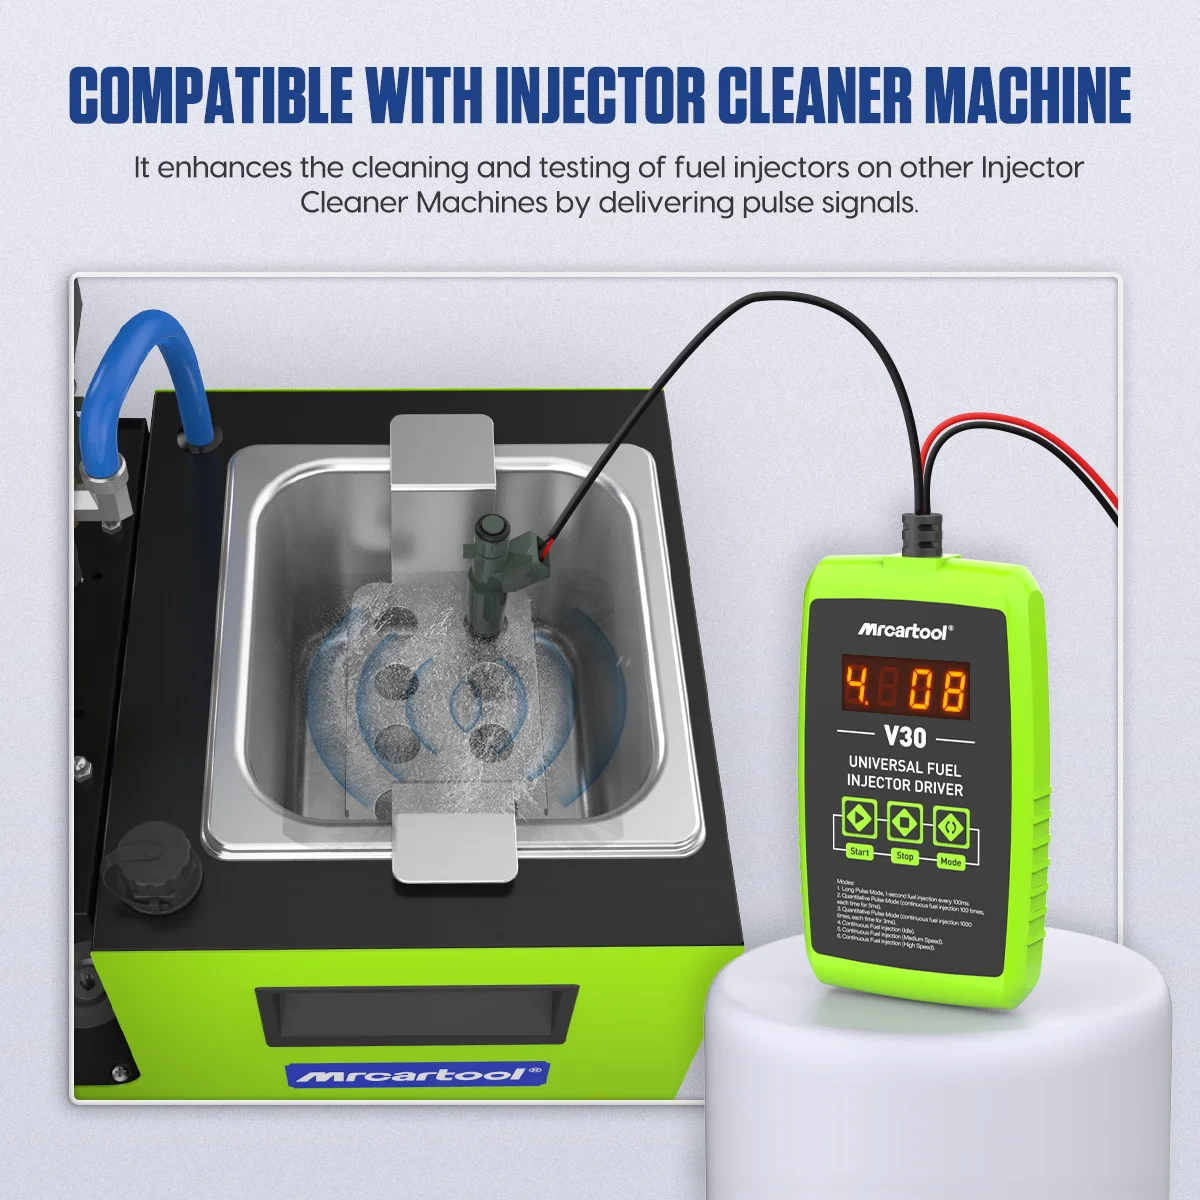
Credit: www.aliexpress.com
Common Mistakes To Avoid
Many beginners make simple errors that can reduce cleaning effectiveness or even damage the engine.
- Using too much cleaner – More is not better. Always follow label instructions.
- Skipping safety steps – Never ignore goggles or gloves.
- Not relieving fuel pressure – This can lead to dangerous fuel spray.
- Choosing the wrong product – Diesel and gasoline injectors need different cleaners.
- Not fixing underlying problems – If your fuel filter or pump is failing, cleaning injectors won’t help much.
- Ignoring warning signs – If your engine still runs badly after cleaning, get a mechanic to check for deeper issues.
Most importantly, don’t expect miracles from a single cleaning. If your engine has very high mileage or has never had injectors cleaned, you might need several treatments or professional help.
When To Seek Professional Help
DIY cleaning is safe for mild to moderate injector problems. But sometimes, professional service is better:
- Severe clogging – No improvement after two DIY cleanings
- Leaking injectors – Fuel smell or visible leaks
- Electrical injector faults – Trouble codes related to injector circuits
- Unusual noises – Knocking or ticking from the engine
Professionals use ultrasonic cleaning and can test each injector’s spray pattern. While more expensive, it can restore like-new performance.
Credit: forums.jag-lovers.com
The Hidden Benefits Of Regular Cleaning
Besides smoother running and better gas mileage, clean injectors can:
- Lower your car’s emissions
- Prevent costly catalytic converter damage
- Reduce engine wear and tear
- Maintain resale value
Many car owners don’t realize that neglected injectors can cause a chain reaction of problems in other engine parts. This is why regular cleaning, even as a simple DIY, pays off in the long run.
Real-world Example: Diy Success Story
A 2012 Toyota Corolla owner was experiencing rough idling and poor acceleration. After using a pressurized cleaning kit and following all safety steps, they reported:
- Noticeable improvement in smoothness after one cleaning
- 8% better fuel economy (measured over two weeks)
- No more check engine light
This shows that with the right tools and patience, DIY fuel injector cleaning can deliver real results.
For further reading and deep technical details, you can visit the Wikipedia page on Fuel Injectors.
Frequently Asked Questions
How Often Should I Clean My Fuel Injectors?
Most experts suggest cleaning every 30,000 to 45,000 miles. If you use poor-quality fuel, drive short trips, or notice symptoms like rough idling, clean them sooner.
Can I Use Any Fuel Injector Cleaner For My Car?
No. Always check the label for compatibility with your engine type (gasoline or diesel). Some cleaners are made for specific car brands or fuel systems.
Is It Safe To Clean Fuel Injectors Myself?
Yes, as long as you follow safety precautions and use the right tools. Always work in a ventilated area, wear safety gear, and follow product instructions closely.
What Happens If I Don’t Clean My Injectors?
Clogged injectors can lead to poor performance, higher fuel use, engine damage, and expensive repairs. Over time, neglect can hurt your car’s reliability and value.
Will Injector Cleaning Fix My Check Engine Light?
It can, if the problem is caused by dirty injectors. However, other engine issues can also trigger the light. If the light stays on after cleaning, have a mechanic check your car.
Keeping your fuel injectors clean is one of the simplest ways to keep your car running well. With the right approach and a little care, you can enjoy better performance, save money, and drive with confidence.
