Changing your car’s oil at home can save money and help you understand your vehicle better. While it may sound complicated, the process is simpler than many people think. If you follow each step carefully, you can finish the job in about an hour, even if you’re new to car maintenance.
Performing your own oil change also means you know the job was done right. Many first-timers miss some small details, but this guide covers everything you need for a smooth and clean oil change.
Why Change Your Car Oil Yourself?
Doing your own oil change has several benefits. First, you can save $25–$75 each time, compared to visiting a professional shop. Second, you control the quality of the oil and oil filter used. Third, you can inspect your car for leaks or worn parts. Besides, it can be a satisfying skill to learn. Mechanics often recommend changing the oil every 5,000 to 7,500 miles, but check your car’s manual for the exact interval.
One thing beginners often overlook is the sense of accomplishment from hands-on work. Another is the chance to spot early signs of engine trouble, like oil sludge or metal shavings in the old oil. These small checks can help you avoid bigger repairs later.
Tools And Materials Needed
Before starting, gather these items:
- Engine oil (type and amount from your owner’s manual)
- Oil filter (correct size for your car)
- Oil filter wrench
- Socket wrench set (usually 13mm–17mm)
- Oil drain pan
- Funnel
- Latex gloves
- Jack and jack stands or sturdy ramps
- Rags or paper towels
- Car owner’s manual
- Safety glasses (recommended)
Some people forget the funnel or rags, which can make the job messy. Always check you have everything before you begin.
Understanding Oil Types And Filters
Not all engine oils and filters are equal. Using the wrong oil can damage your engine or void your warranty. There are three main types of oil:
- Conventional Oil: Basic and affordable, good for older engines.
- Synthetic Oil: Offers better protection and lasts longer. Many modern cars require synthetic.
- Synthetic Blend: Mix of both, for balance of cost and performance.
Always buy oil with the correct viscosity (e.g., 5W-30) as listed in your car’s manual. For filters, choose a quality brand that fits your engine model. Cheap filters can clog quickly or leak, causing engine problems.
Here’s a simple comparison of oil types:
| Oil Type | Price (per quart) | Typical Lifespan | Best For |
|---|---|---|---|
| Conventional | $3–$6 | 3,000–5,000 miles | Older Cars |
| Synthetic Blend | $5–$8 | 5,000–7,500 miles | Mixed Driving |
| Synthetic | $7–$12 | 7,500–10,000 miles | Modern Engines |
Another detail many miss: Some cars need a special crush washer for the oil drain plug. Always check the manual or ask at the parts store.
Preparing Your Car
- Warm up your engine for 2–3 minutes. Warm oil drains faster and carries more dirt out of the engine.
- Park on a level surface. Use wheel chocks for safety.
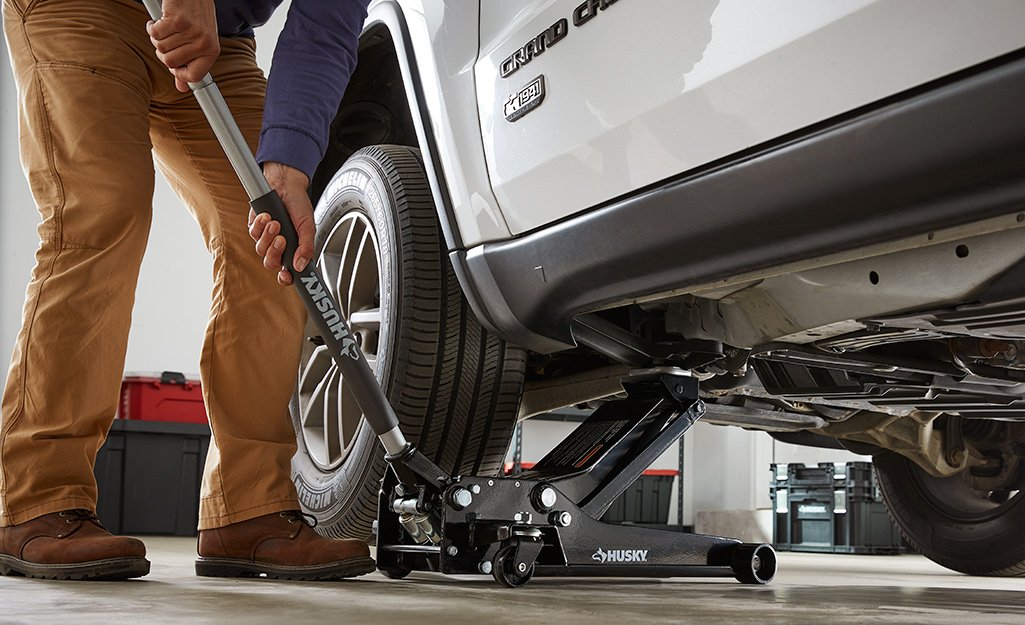
- Lift the car with a jack and secure with jack stands, or drive onto sturdy ramps. Never trust only the jack to hold the car.
- Put on gloves and safety glasses.
Take care not to burn yourself on hot engine parts. Let the car cool slightly if it feels too hot.
Step-by-step Guide To Changing Oil
Let’s go through the full process:
1. Locate The Oil Drain Plug
Find the oil drain plug under the engine. It usually looks like a large bolt at the bottom of the oil pan. Place your oil drain pan underneath before you begin.
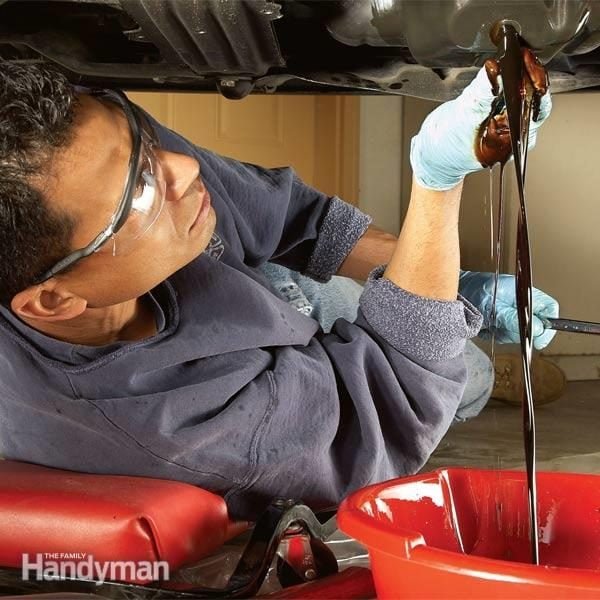
2. Remove The Drain Plug
Using your socket wrench, loosen the plug carefully. Oil will start to flow out quickly. Let all the oil drain—this can take 5–10 minutes. Clean the plug with a rag and check the washer.
3. Remove And Replace The Oil Filter
Locate the oil filter (usually a round, metal canister). Use the oil filter wrench to remove it. Some oil will spill out, so keep the pan under the filter. Before installing the new filter, rub a little new oil on the rubber gasket. This helps create a tight seal.
Screw on the new filter by hand only—don’t use the wrench to tighten it, or you might damage the seal.
4. Reinstall The Drain Plug
Check that the plug and washer are clean. Screw the plug back in by hand, then tighten with the wrench (usually 1/4 turn past snug). Over-tightening can strip the threads.
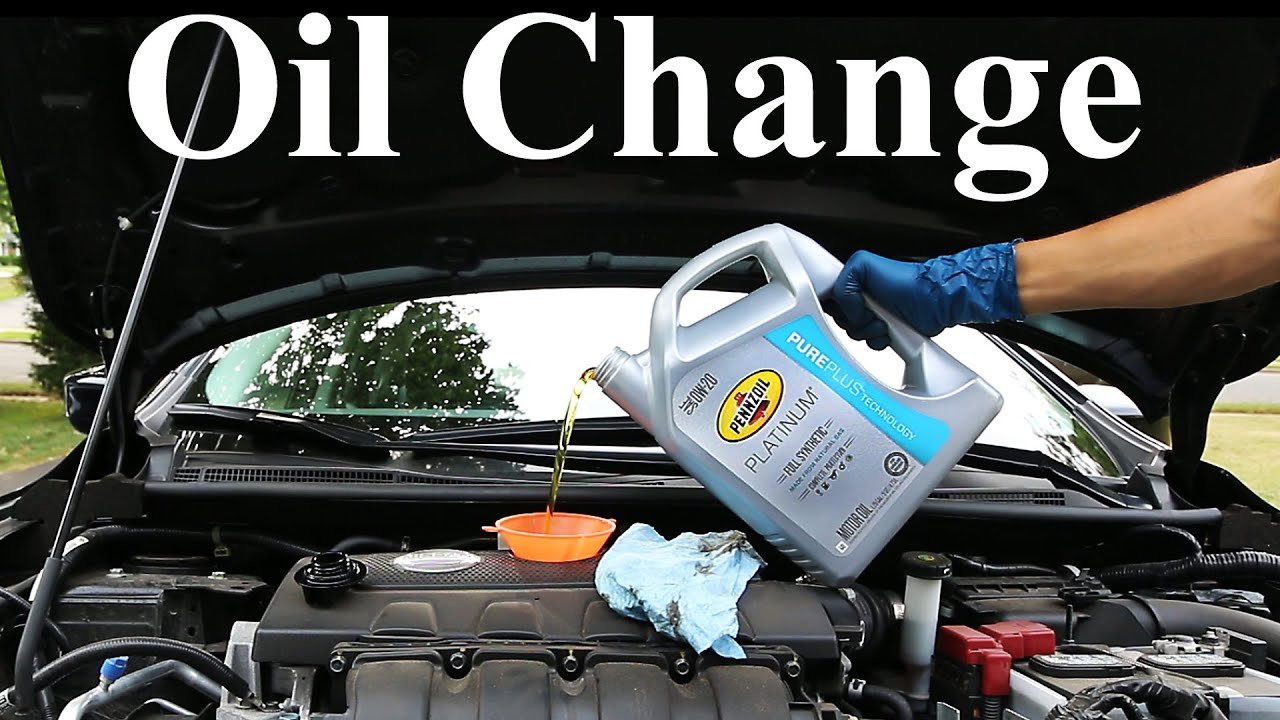
5. Add New Oil
Find the oil filler cap on top of the engine. Remove it and place a funnel in the opening. Pour in the amount of oil listed in your manual. Replace the cap.
6. Check Oil Level And Leaks
Start the engine and let it run for 30–60 seconds. This circulates the new oil. Turn off the engine and wait a few minutes. Pull out the dipstick, wipe it, reinsert, then check the oil level. Add more if needed.
Look under the car for leaks around the plug or filter. If you see drips, tighten those parts gently.
7. Dispose Of Old Oil Properly
Never pour used oil down the drain or on the ground. Pour it into a sealed container and take it to an auto parts store or recycling center. Many places accept used oil for free.
Common Mistakes To Avoid
Even careful people make errors when changing oil. Here are some to watch for:
- Wrong oil type or amount: Check your manual every time.
- Forgetting to replace the drain plug: This can cause a huge mess and engine damage.
- Double-gasketing: Sometimes the old oil filter gasket sticks to the engine. Always check and remove it.
- Not tightening the filter enough: Oil can leak if the filter is loose.
- Not checking for leaks: Always inspect after filling with oil.
Credit: www.youtube.com
Cleaning Up And Resetting The Oil Light
Wipe off any oil spills from the engine or driveway. Some cars have a maintenance light that needs to be reset. To reset, follow these steps (methods vary by car):
- Turn the ignition to the “on” position without starting the engine.
- Press and hold the trip/reset button on the dashboard.
- Wait for the oil light to blink or turn off, then release the button.
Check your manual or search online for your car’s specific reset instructions.
How Often Should You Change Your Oil?
Most cars need an oil change every 5,000–7,500 miles if you use synthetic oil. If you drive in extreme conditions (short trips, towing, very hot or cold climates), you may need to change it sooner. Always follow your manufacturer’s advice.
Some cars have oil-life monitors that show a percentage. When it drops below 20%, plan for an oil change soon.
Here’s a quick look at common oil change intervals:
| Driving Style | Oil Type | Change Interval |
|---|---|---|
| Normal | Synthetic | 7,500 miles |
| Severe | Synthetic | 5,000 miles |
| Normal | Conventional | 3,000 miles |
Credit: www.familyhandyman.com
Environmental And Safety Tips
Used oil can pollute water and harm wildlife. Always store old oil in a sealed container and recycle it. Never leave oil-soaked rags or gloves where children or pets can reach them.
Wear gloves to protect your skin, and work in a well-ventilated area. If oil gets on your skin, wash with soap and water right away.
Troubleshooting After Oil Change
If you notice a puddle under your car, check the drain plug and filter for tightness. If your oil light stays on, check the oil level. If the engine is noisy, you may have used the wrong oil or not added enough.
Don’t ignore warning signs. If you’re not sure what’s wrong, get help from a trusted mechanic.
Credit: www.homedepot.com
Quick Reference: Steps For Changing Car Oil
For an easy reminder, here are the main steps:
- Gather tools and supplies.
- Warm up engine.
- Lift and secure car.
- Remove drain plug and drain oil.
- Remove and replace oil filter.
- Reinstall drain plug.
- Add new oil.
- Run engine and check for leaks.
- Dispose of old oil properly.
How Much Does A Diy Oil Change Cost?
Doing your own oil change usually costs $25–$45 (for most cars) with quality oil and filter. At a shop, the same service might cost $45–$120, depending on your car and location.
Here’s a rough cost breakdown:
| Item | DIY Cost | Shop Cost |
|---|---|---|
| Oil (5 quarts) | $20–$40 | Included |
| Oil Filter | $5–$10 | Included |
| Labor | $0 | $25–$80 |
| Disposal Fee | $0 | $3–$5 |
Final Tips For First-timers
- Read your owner’s manual—every car is different.
- Use high-quality oil and filters.
- Take your time and stay organized.
- Dispose of oil responsibly.
- Keep a record of the date and mileage.
Your first oil change may feel slow, but it gets easier each time. If you want more details about different oils or filters, check out this Wikipedia article on motor oil.
Changing your car’s oil at home is a smart way to care for your vehicle and your wallet. With the right tools and careful steps, you can do a professional-quality job in your own garage.
Frequently Asked Questions
How Do I Know What Oil And Filter My Car Needs?
Check your owner’s manual for the correct oil type (like 5W-30) and amount. The manual also lists the correct filter part number. If you don’t have the manual, most auto parts stores can look up the right oil and filter using your car’s make, model, and year.
What If I Spill Oil On The Driveway?
Clean oil spills right away using cat litter, sawdust, or a special oil-absorbing powder. Let it sit for 15–30 minutes, sweep it up, then wash with soap and water. This prevents stains and keeps the area safe.
Can I Change Oil Without Lifting My Car?
Some cars have enough ground clearance to let you slide under with just a drain pan. Most modern cars are low, so using ramps or a jack with stands is safer and makes the job easier.
How Do I Dispose Of Used Oil And Filter?
Pour used oil into a sealed container and bring it to a recycling center or auto parts store. Never throw oil or filters in the trash or pour them down drains. Many stores accept used oil for free.
What Happens If I Use The Wrong Oil?
Using oil with the wrong viscosity or type can cause engine noise, wear, or even damage over time. Always follow your car’s manual. If you realize you used the wrong oil, change it as soon as possible.
With these answers and tips, you’re ready to change your car oil safely and with confidence.
