Every car owner knows the feeling: you walk to your car and notice a scratch that wasn’t there yesterday. Scratches can appear from parking lot accidents, flying stones, branches, or even careless passersby. While some scratches are minor and easy to fix, others need more attention and skill. The good news is, many car scratches can be repaired at home with the right tools, products, and knowledge. Taking care of scratches quickly keeps your car looking good and protects its value.
This guide will walk you through everything you need to know about how to fix car scratches. We’ll cover how to identify different scratch types, what tools and products you need, detailed repair steps, common mistakes, and tips for a smooth finish. By the end, you’ll feel ready to tackle most scratches yourself, saving money and time.
Understanding Types Of Car Scratches
Before you try to fix a scratch, it’s important to know what type it is. Car paint has several layers, and scratches can affect just the top or go much deeper.
| Scratch Type | Layer Affected | Repair Difficulty |
|---|---|---|
| Clear Coat Scratch | Top clear layer | Easy |
| Paint Scratch | Base color | Moderate |
| Primer/Deep Scratch | Primer or metal | Hard |
- Clear coat scratches are the most common. They only affect the protective top layer and can often be fixed with simple products.
- Paint (color) scratches go through the clear coat and into the colored paint. These need extra care and sometimes touch-up paint.
- Deep scratches reach the primer or even the metal. These are harder to fix and may need professional help, but some DIY methods can work if you follow steps carefully.
A quick way to check: Run your fingernail across the scratch. If your nail doesn’t catch, it’s likely a clear coat scratch. If it does, the scratch is deeper.
Tools And Materials You Need
Having the right tools makes the job easier and gives better results. Here’s what you’ll need for most scratch repairs:
- Microfiber cloths: For cleaning and polishing without scratching the surface.
- Automotive soap: Special car soap is gentle on paint and removes dirt.
- Scratch remover or rubbing compound: Used for light scratches on the clear coat.
- Polishing compound: Restores shine after using abrasives.
- Touch-up paint: Matches your car’s color for deeper scratches.
- Fine sandpaper (2000-3000 grit): For smoothing deep scratches.
- Primer: Needed if the scratch reaches bare metal.
- Clear coat: Protects the repair and gives a glossy finish.
- Masking tape and paper: To protect the areas around the scratch.
- Applicator brushes or pens: For precise paint application.
- Gloves: Protect your hands from chemicals.
Some kits include several products together, but buying separate items can give you better quality and control.
How To Fix Light Clear Coat Scratches
If the scratch is on the clear coat only, it’s the easiest to fix. Here’s how to do it step by step.
Step 1: Clean The Area
Wash the scratched area using automotive soap and a microfiber cloth. Remove all dirt, dust, and grease. Dry the area completely. Any dirt left can cause more scratches during repair.
Step 2: Apply Scratch Remover
Put a small amount of scratch remover or rubbing compound on a clean microfiber cloth. Rub it gently into the scratch using small circular motions. Press lightly and focus on the scratched area.
Step 3: Wipe And Inspect
After about 30 seconds, wipe the area with a clean cloth. Check if the scratch is gone. If it’s still visible, you can repeat the process one or two more times.
Step 4: Polish For Shine
Use a polishing compound to restore shine to the area. This step blends the repaired spot with the rest of the paint and removes any dullness from the rubbing compound.
Step 5: Protect
Apply a layer of wax to protect the area from future damage.
Tip: Don’t use household abrasives or rough towels—they can make the scratch worse.
Fixing Paint Scratches (through The Clear Coat)
When scratches reach the colored paint layer, the process needs more steps. Here’s what to do.
Step 1: Clean And Mask
Clean the area as before. Use masking tape and paper to protect the area around the scratch. This keeps paint and compounds from affecting nearby surfaces.
Step 2: Sand The Scratch
Use fine sandpaper (2000-3000 grit) soaked in water. Gently sand the scratch in the direction of the scratch, not in circles. This smooths the edges so the repair blends in. Be careful not to sand too much.
Step 3: Apply Touch-up Paint
Let the area dry. Shake the touch-up paint well and use a small brush or pen to fill in the scratch. Apply thin layers and let each dry before adding another. This prevents drips and uneven paint.
Step 4: Let Paint Cure
Wait for the paint to dry completely. This can take a few hours or overnight, depending on the type.
Step 5: Add Clear Coat
Apply a thin layer of clear coat over the paint. This seals the repair and gives it a glossy finish. Let it dry fully.
Step 6: Polish And Blend
After the clear coat is dry, use a polishing compound to blend the repaired area with the rest of the car. This step helps hide the repair.
Insight: Many beginners rush the drying steps. Patience is key—rushing can cause bubbling or uneven paint.
Repairing Deep Scratches (primer Or Metal Visible)
Deep scratches are more serious, but you can try to fix them yourself if you’re careful.
Step 1: Clean And Prepare
Wash the area well. If the scratch has exposed metal, use a rust remover or a rust-preventing primer. Mask the area around the scratch.
Step 2: Sand And Smooth
Use wet fine sandpaper to carefully smooth the edges of the scratch. Be gentle to avoid making the scratch wider.
Step 3: Apply Primer
If you see bare metal, use a thin layer of primer. Let it dry fully—usually about 30 minutes.
Step 4: Apply Touch-up Paint
Use small amounts of touch-up paint. Build up the layers until the paint is level with the rest of the surface.
Step 5: Add Clear Coat
Once the touch-up paint is dry, add a thin clear coat layer. Let it cure completely.
Step 6: Sand, Polish, And Wax
After the clear coat is fully dry, lightly sand with very fine sandpaper if needed, then polish and wax the area for a smooth, shiny finish.
Non-obvious insight: Deep scratches need careful layering. Too much paint at once will drip or run, so use patience and multiple thin coats.
Key Tips For A Professional Finish
- Work in shade: Sunlight dries products too fast, causing streaks and smears.
- Temperature matters: Most products work best between 60–80°F (15–27°C).
- Color match: Always use the correct color code for your car (found on the vehicle or in the manual).
- Avoid over-polishing: Too much rubbing can remove more paint than intended.
- Test products: Try new products on a small hidden spot first.
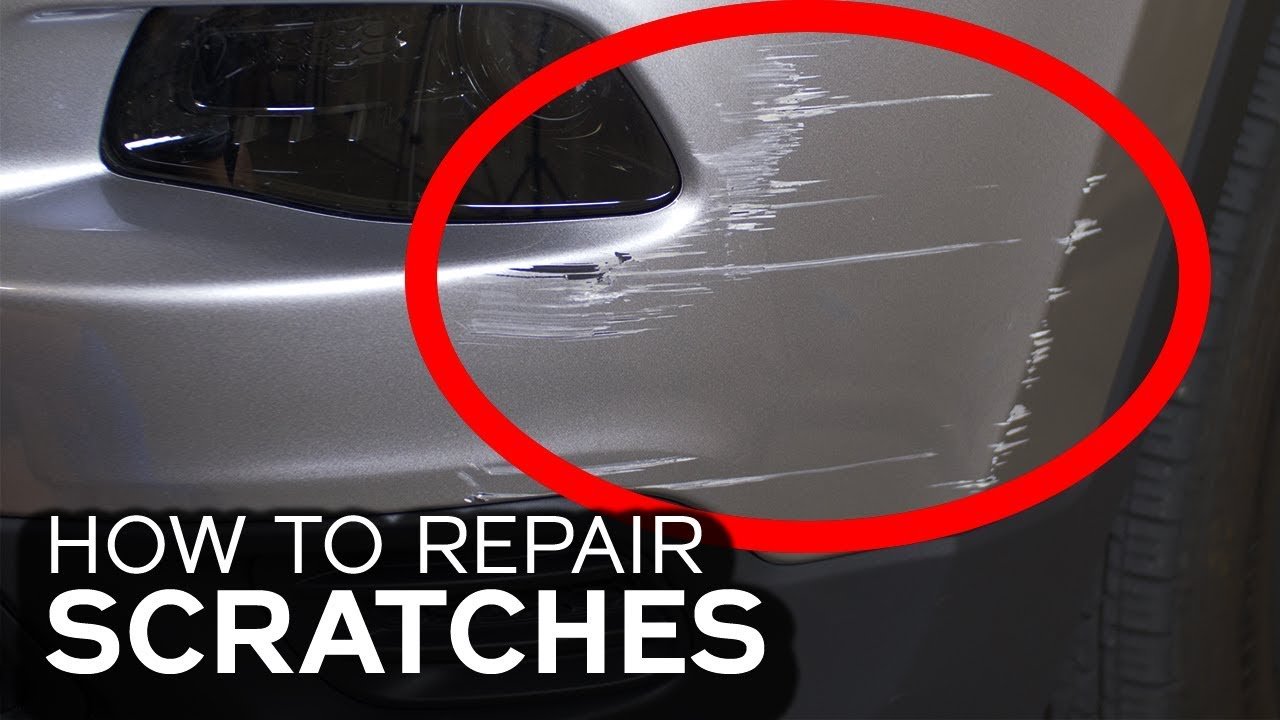
Credit: www.youtube.com
When To See A Professional
Some scratches are too deep, too wide, or in tricky spots (like near sensors or cameras). If you see rust, large areas of missing paint, or if you’re unsure, a professional repair is safer. Professionals use spray guns and paint booths for a seamless finish.
It can cost more, but saves time and hassle for big jobs.
Common Mistakes To Avoid
- Using rough towels or sponges: These can add more scratches.
- Skipping cleaning: Dirt on the surface can ruin the repair.
- Not letting layers dry: Rushing leads to poor results.
- Using the wrong color: Mismatched paint is very noticeable.
- Applying thick paint layers: This causes drips and uneven spots.
- Sanding too hard: Can remove too much paint and make the area worse.
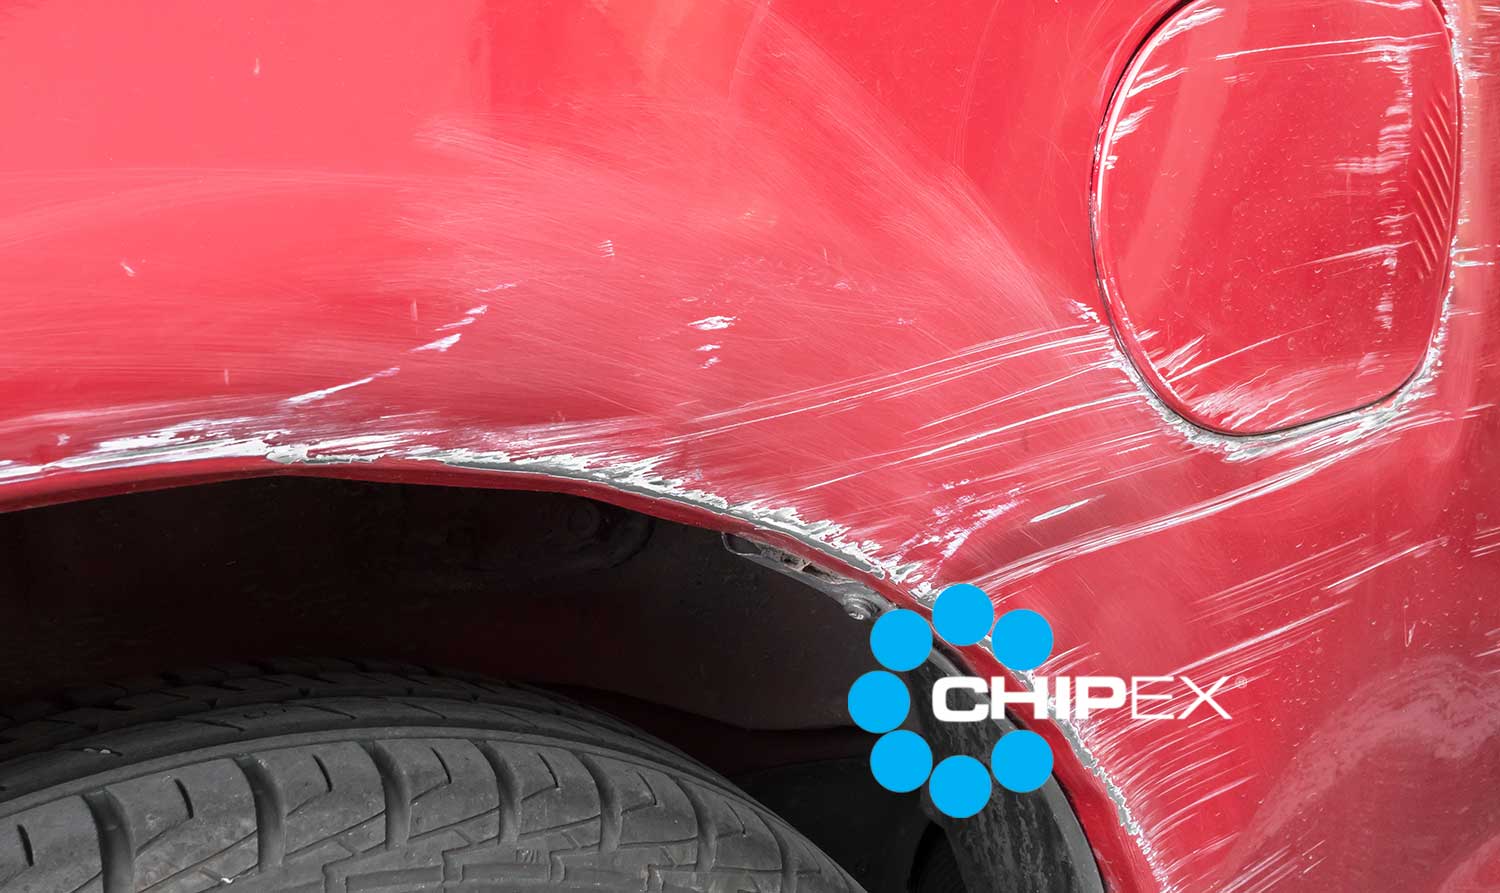
Credit: chipex.com
Cost Comparison: Diy Vs. Professional Repair
Here’s a quick look at typical costs for fixing car scratches:
| Repair Method | Estimated Cost | Time Needed |
|---|---|---|
| DIY Scratch Remover Kit | $10–$40 | 1–2 hours |
| DIY Touch-Up Paint Kit | $15–$50 | 2–4 hours |
| Professional Repair (Minor) | $100–$300 | 1–3 days |
| Professional Repair (Deep/Large) | $300–$1,000+ | 2–5 days |
DIY is much cheaper and often fast, but the result depends on your skill and the scratch’s depth. For large or deep scratches, professional help may be worth the extra cost.
Choosing The Right Scratch Repair Product
With so many products available, picking the right one can be confusing. Here’s a quick comparison of popular options:
| Product Type | Best For | Ease of Use | Notes |
|---|---|---|---|
| Scratch Remover Cream | Light clear coat scratches | Easy | Quick results, best for shallow damage |
| Touch-Up Paint Pen | Small paint scratches | Moderate | Requires color match, best for thin lines |
| Touch-Up Paint Kit | Deeper scratches | Moderate/Hard | Includes paint, primer, clear coat |
| Professional Detailing Kit | All-in-one repair | Moderate | Higher cost, better finish |
Non-obvious insight: Some cheap kits use low-quality paint that fades or peels. Always buy from trusted brands or your car’s manufacturer.
How To Prevent Scratches In The Future
Preventing scratches is easier than fixing them. Here are some practical ways to keep your car looking great:
- Wash regularly: Dirt and grit can cause scratches during cleaning.
- Use two-bucket washing: One for soapy water, one for rinsing your cloth.
- Park carefully: Avoid tight spaces or areas with bushes and trees.
- Use a car cover: Protects from weather, pets, and falling objects.
- Choose soft cleaning cloths: Microfiber is best for paint.
- Wax your car: Adds a layer of protection against minor damage.
By building these habits, you can reduce the chance of new scratches and keep your car’s paint in top shape.
If you want to learn more about auto paint repair and car maintenance, check out this guide from Consumer Reports.
A small scratch doesn’t have to ruin your car’s appearance. With the right approach, most scratches can be fixed at home. Take your time, use the correct products, and you’ll be surprised at how much better your car looks.
Frequently Asked Questions
How Can I Tell If A Scratch Is Just On The Clear Coat?
You can run your fingernail across the scratch. If it doesn’t catch, it’s likely only on the clear coat. If your nail catches, the scratch is deeper and may need touch-up paint.
Is It Safe To Use Toothpaste To Fix Car Scratches?
Toothpaste can sometimes help with very light clear coat scratches because it’s mildly abrasive. However, it’s not as effective or safe as a real automotive scratch remover.
Will Fixing Scratches Myself Void My Car Warranty?
Usually, repairing small scratches yourself does not affect your car warranty. However, if you damage the paint further or use incorrect products, it might cause problems. Always check your car’s warranty terms.
What If My Car’s Paint Color Is Hard To Match?
Every car has a paint code listed on the vehicle or in the manual. Use this code to order the exact color from your dealer or an auto parts store. Never guess, as mismatched paint is very noticeable.
Are Scratch Remover Kits Good For All Types Of Scratches?
Scratch remover kits work best for light surface scratches. Deeper scratches that go through the paint or show metal need touch-up paint and more steps for a proper repair. Always check the kit instructions to see what it’s meant for.
With the steps and advice above, you can handle most car scratches yourself. Remember, patience and careful work are key to a great repair. If you have doubts, don’t hesitate to consult a professional for advice or service.
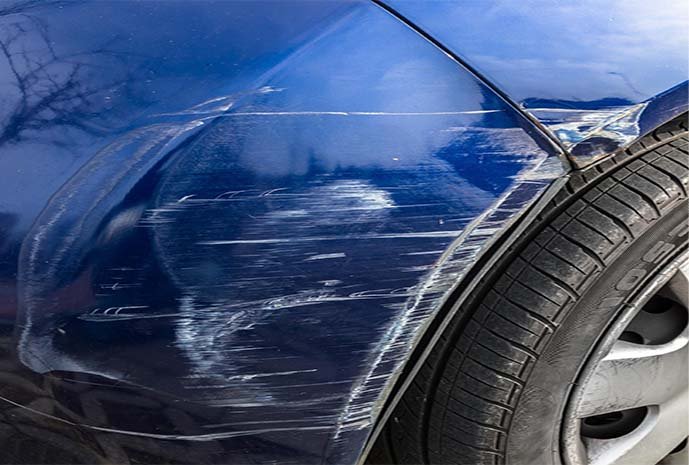
Credit: www.carcility.com
