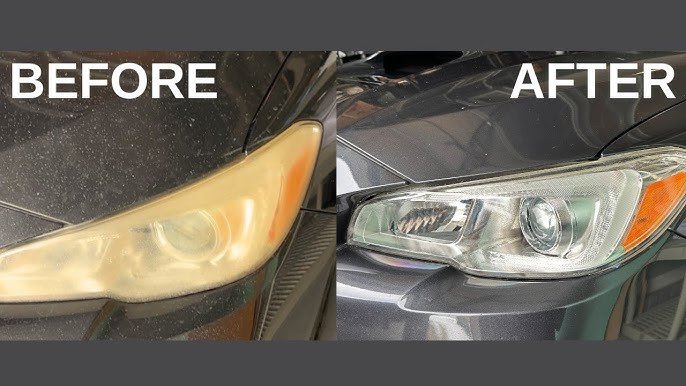
Foggy headlights are a common problem for car owners. Over time, the clear plastic on headlights becomes dull, yellow, and cloudy. This can make your car look old and, more importantly, reduce your night-time visibility. Many people don’t realize that foggy headlights can also be a safety issue. Dim headlights mean it’s harder for you to see the road and for others to see you.
Luckily, you don’t have to buy new headlights when this happens. You can fix foggy headlights yourself with a few tools, some time, and a bit of patience. In this guide, you’ll learn why headlights get foggy, how to clean them, and how to keep them clear for longer.
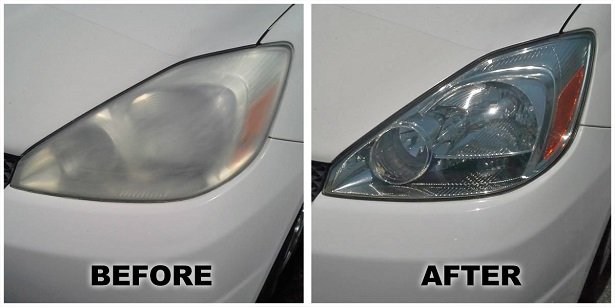
Plus, you’ll see honest comparisons of different cleaning methods so you can pick what works best for your situation.
Why Do Headlights Get Foggy?
Headlights today are usually made from polycarbonate plastic. This material is tough and shatter-resistant, but it’s also sensitive to sunlight, weather, and road chemicals. Over time, the following things cause headlights to get cloudy:
- UV rays: Sunlight breaks down the top layer of plastic, making it rough and hazy.
- Oxidation: Oxygen from the air reacts with the plastic, causing it to lose its shine.
- Dirt and chemicals: Road salt, car wax, and pollution stick to headlights, adding to the fog.
- Water vapor: Moisture can get inside the headlight housing, causing fog on the inside.
Not everyone knows that the original clear coating on new headlights is what keeps them shiny. Once this coating wears off, the plastic is exposed and fogs up much faster.
Signs Your Headlights Need Cleaning
Sometimes it’s obvious when your headlights are cloudy. But you might not notice the problem until you compare your car’s lights to a new car’s. Here are some clear signs:
- The headlights look yellow, white, or milky
- You can’t see the headlight bulb clearly through the cover
- Night driving feels dimmer, even with new bulbs
- There are visible scratches or rough spots on the lens
Don’t wait until your headlights are completely blocked. Even a little cloudiness can cut light output by more than 50%.
Tools And Materials You’ll Need
Before you start, gather the right tools. Using the best supplies will make the job easier and give better results.
For a basic DIY headlight cleaning, you’ll need:
- Masking tape (to protect paint)
- Microfiber cloths
- Bucket of water and soap
- Sandpaper (600, 1000, 2000 grit – for deeper cleaning)
- Headlight restoration kit (optional, but useful)
- Plastic polish or rubbing compound
- UV sealant or clear spray (to protect your work)
- Spray bottle (with water)
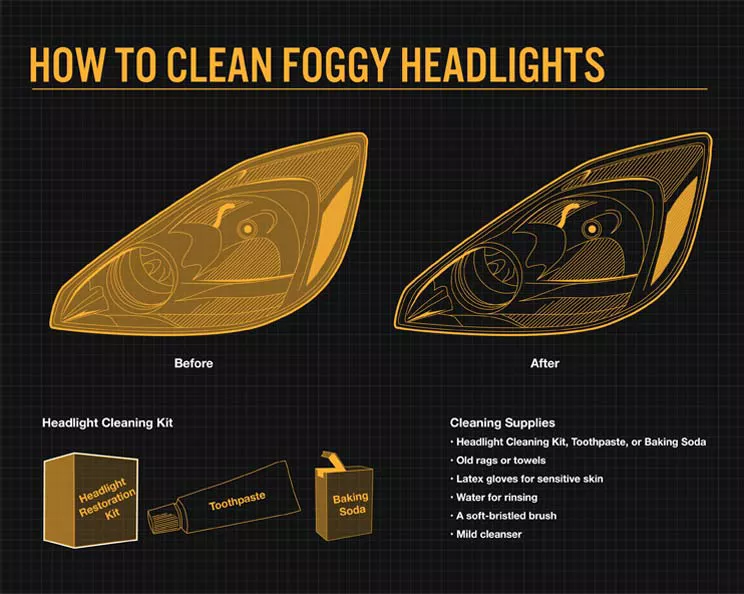
Some people use household items like toothpaste or baking soda, but these are less effective for heavy fogging.
Comparing Headlight Cleaning Methods
Let’s look at the most popular ways to clean foggy headlights. The table below compares the pros and cons of each method so you can choose the right one for your headlights:
| Method | Cost | Results | How Long It Lasts | Skill Needed |
|---|---|---|---|---|
| Toothpaste | Low | Removes light fog | 2-4 weeks | Easy |
| Polishing Compound | Medium | Removes moderate fog | 2-3 months | Moderate |
| Headlight Restoration Kit | Medium/High | Removes heavy fog | 6-12 months | Moderate |
| Sandpaper & Polish | Medium | Professional look | 1 year+ | Advanced |
| Replace Headlight | High | Like new | Years | Professional |
Non-obvious tip: Many people start with toothpaste for quick results, but it rarely lasts long. Investing in a proper kit or sandpaper gives better results and saves time over the months ahead.
Credit: www.youtube.com
Step-by-step Guide: How To Fix Foggy Headlights
Different headlights need different care. Here’s a full guide for cleaning light to heavy fogging, using both simple and advanced methods.
1. Prepare Your Work Area
Park your car in a shaded, dry place. Direct sunlight can dry products too fast and cause uneven results.
- Wash your headlights with soap and water.
- Dry with a microfiber cloth.
- Stick masking tape around the headlights to protect your car’s paint.
2. Toothpaste Method (for Light Fogging)
Toothpaste contains mild abrasives that polish the plastic.
- Squeeze a small amount of white toothpaste onto a damp cloth.
- Rub in small circles over the headlight for 2-3 minutes.
- Wipe off with a clean, wet cloth.
- Dry and inspect. If needed, repeat.
Tip: Toothpaste works best for new fogging. It won’t fix deep yellowing or scratches.
3. Using A Headlight Restoration Kit
Most kits include sandpaper, polish, and a UV sealant. Read the instructions, but the steps are usually:
- Wet-sand the headlight (start with the lowest grit, move to higher grits).
- Rinse between sanding steps.
- Apply the polish with a clean cloth or pad.
- Buff until clear.
- Wipe off residue, then apply the UV sealant.
Extra advice: Always keep the surface wet while sanding. Dry sanding can scratch the lens.
4. Sandpaper And Polish (for Heavy Fogging)
If your headlights are deeply yellowed or rough, use sandpaper.
- Start with 600 grit sandpaper. Wet it and sand the headlight horizontally.
- Move to 1000 grit, sanding vertically.
- Finish with 2000 grit, sanding in circles.
- Rinse and dry the headlight.
- Apply plastic polish with a clean cloth, rubbing until glossy.
- Buff off any extra polish.
This method takes more time but gives the best, longest-lasting result.
5. Apply Uv Sealant
This is a step many people skip, but it’s important. Without a UV sealant, headlights will get foggy again within months.
- Clean the headlight with alcohol to remove any oils.
- Apply a thin layer of UV sealant (follow the product instructions).
- Let it dry fully before driving.
Insider tip: Some car owners use clear coat spray paint as a DIY sealant, but it can be risky without practice. For beginners, stick to a liquid UV sealant.
Preventing Headlights From Getting Foggy Again
Restoring your headlights takes effort, so it’s smart to protect them. Here are ways to keep them clear for longer:
- Park in the shade or in a garage whenever possible.
- Wash headlights regularly to remove dirt and chemicals.
- Wax your headlights with car wax every month. It adds a thin layer of protection.
- Re-apply UV sealant every 6-12 months for best results.
- Avoid harsh chemicals when cleaning your car.
A common mistake is forgetting the UV sealant. No matter how well you polish, skipping this step means the fog will return quickly.
When To Replace Your Headlights
Sometimes, headlights are too far gone for cleaning. If you see deep cracks, water inside the housing, or the plastic is badly pitted, replacement is the safest option.
Data from the National Highway Traffic Safety Administration (NHTSA) shows that headlight clarity is critical for road safety. If your restoration does not improve visibility, don’t risk driving with poor headlights.
Replacement cost depends on your car model. For many cars, new headlight assemblies cost between $150 and $400 each, plus labor. If you’re not sure, ask a mechanic to check if your headlights are still safe.
The Cost Of Headlight Restoration
You might wonder if it’s worth fixing headlights yourself or paying a professional. Here’s a simple cost comparison:
| Option | DIY Cost | Pro Cost | Average Result |
|---|---|---|---|
| Toothpaste | $1–$3 | Not offered | Temporary |
| Headlight Kit | $15–$30 | $50–$120 | Good to excellent |
| Replace Headlight | $150–$400+ | $200–$800+ | Like new |
Non-obvious insight: A professional restoration often includes machine polishing and a high-grade sealant, which can last longer than basic DIY. However, most people get good results at home if they follow instructions carefully.
Credit: www.yallamotor.com
Common Mistakes To Avoid
Even careful people make errors when fixing foggy headlights. Avoid these mistakes for the best results:
- Skipping the UV sealant step
- Using dry sandpaper (always keep it wet)
- Polishing only one headlight (always do both for even brightness)
- Not taping around the headlight, which can scratch car paint
- Using colored toothpaste or gels, which can stain the plastic
Another thing beginners miss: If moisture is inside the headlight, cleaning the outside won’t help. You’ll need to reseal the headlight or replace the gasket.
How Long Do Restored Headlights Stay Clear?
How long your headlights stay clear depends on the method and your environment. In dry, sunny places, fog can return faster. With proper sanding, polishing, and UV sealant, most headlights stay clear for 6 months to a year or longer.
Regular cleaning and protection can extend this time.
Real-world Example
A 2015 Toyota Camry owner noticed their headlights were so foggy, they could barely see road signs at night. Using a headlight restoration kit with sanding, polish, and UV sealant, they restored both headlights in about 90 minutes. Six months later, the headlights were still clear, thanks to regular washing and reapplying wax every few months.
When To Get Help From A Professional
If you’re not comfortable with DIY methods, or your headlights are deeply scratched, a professional detailer can help. They use special tools and high-quality sealants. In some cases, they even offer a warranty on their work.
For more about the science of headlight restoration and safety, you can read this Wikipedia article on headlamps.
Credit: tires.bridgestone.com
Frequently Asked Questions
How Do I Know If My Headlights Are Foggy On The Inside Or Outside?
If wiping the outside doesn’t improve clarity, and you see water drops or mist inside the lens, the fog is inside. This usually means the headlight seal is broken. Fixing this often needs a mechanic or headlight replacement.
Can I Use Baking Soda Instead Of Toothpaste For Cleaning Headlights?
Yes, baking soda is a mild abrasive like toothpaste. Mix it with water to make a paste and rub it on the headlight. It works for light fog, but isn’t as effective for deep yellowing or scratches.
Is It Safe To Use A Clear Coat Spray Paint As A Headlight Sealant?
Clear coat spray can protect headlights but is tricky to apply. If sprayed unevenly, it can drip or look cloudy. For beginners, liquid UV sealants made for headlights are safer and easier to use.
How Often Should I Clean And Protect My Headlights?
Clean your headlights every time you wash your car. Apply a UV sealant or wax every 3–6 months, or more often if your car sits in the sun a lot.
Do Headlight Restoration Kits Really Work?
Yes, most kits work well for moderate to heavy fogging if you follow instructions. The key is to sand, polish, and seal properly. The results last longer if you keep protecting the headlights.
Foggy headlights don’t have to be permanent or expensive. With the right tools and a bit of effort, you can restore clarity, improve your car’s look, and drive more safely at night. Follow these steps, avoid common mistakes, and enjoy clear headlights for miles to come.
