A car’s drive system is full of moving parts, but few are as important as the CV joint boot. If you want your vehicle to run smoothly, especially when turning or driving over bumps, you need to keep these small rubber covers in good condition. Many car owners ignore CV joint boots until trouble starts. However, regular inspection can prevent costly repairs and keep your car safe. This guide will help you understand what a CV joint boot is, why inspection matters, and how to check it properly—even if you’re not a car expert.
What Is A Cv Joint Boot?
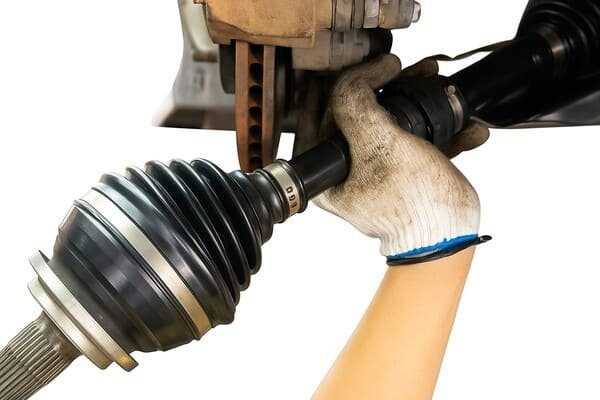
A CV joint boot is a flexible rubber cover that protects the constant velocity (CV) joints in your car’s drive shafts. These joints allow the wheels to turn and move up and down with the suspension. The boot keeps grease inside the joint and blocks dirt, water, and other debris from getting in. If the boot cracks or tears, grease leaks out and contamination gets in, leading to joint failure.
Front-wheel drive and many all-wheel drive cars have CV joints at both ends of the drive shafts. Rear-wheel drive cars with independent suspension may also have them. The boots look like black, ribbed cones, usually located near the wheel and transmission.
Why Cv Joint Boot Inspection Matters
Ignoring a CV joint boot can lead to expensive damage. Here’s why inspection is essential:
- Prevents joint failure: A damaged boot allows grease to escape, leading to metal-on-metal contact inside the CV joint. This can cause grinding, clicking sounds, and eventually complete joint failure.
- Saves money: Replacing a boot is much cheaper than replacing the whole CV joint or drive shaft.
- Maintains safety: A failed CV joint can cause loss of drive to the wheels, which is dangerous—especially at high speeds or during turns.
- Prolongs vehicle life: Keeping boots in good shape helps your car’s suspension and drive system last longer.
Many beginners miss the fact that a torn boot can destroy the joint in less than 1000 km if dirt gets in. Also, some boots crack on the inside folds first, making early detection tricky.
When And How Often To Inspect
You should check your CV joint boots at least twice a year. The best times are during regular oil changes or tire rotations, as the wheels are already off and access is easier. If you drive in rough conditions—like dirt roads, snow, or salty environments—inspect every 3 months.
Unusual noises, grease spots on wheels, or vibration during turns are signs you need to inspect immediately.
Tools And Preparation
You don’t need special skills to inspect a CV joint boot, but having the right tools helps:
- Flashlight or inspection lamp
- Clean rag or paper towels
- Car jack and jack stands
- Wheel chocks for safety
- Gloves (optional)
Always ensure the car is on a flat surface. Set the parking brake and use wheel chocks before jacking up the vehicle.
Steps For Cv Joint Boot Inspection
Follow these simple steps for a thorough inspection.
1. Locate The Boots
Find the CV joint boots behind each wheel (front wheels for front-wheel drive). They look like black, accordion-shaped rubber covers on the axle shaft.
2. Check For Visible Damage
Wipe off dirt and grease with a rag. Shine your flashlight around the boot and look for:
- Cracks, splits, or tears
- Holes (even pinholes let in dirt)
- Loose or missing clamps
Pay attention to the inner folds—these often crack first.
3. Inspect For Leaks
Look for grease splattered around the inside of the wheel or the suspension. This is a clear sign the boot is leaking. Grease may appear shiny and sticky.
4. Move The Suspension
Gently push and pull the axle or turn the steering wheel to stretch the boot. Sometimes cracks only appear when the rubber is flexed.
5. Listen And Feel
If you hear clicking or grinding noises while turning the wheels, the joint may already be damaged. Feel the boot for soft or weak spots, which could mean the rubber is thinning.
6. Compare Both Sides
Check all boots on the car—not just one. If one boot is bad, the others may also be worn.
7. Record Your Findings
Write down any damage or leaks. Take pictures if you’re unsure and want to show a mechanic later.
What To Do If You Find A Problem
If you see any damage to a CV joint boot, act quickly:
- For small cracks or loose clamps, a repair kit may fix the problem temporarily.
- For torn or leaking boots, replace the boot as soon as possible.
- If you hear clicking or grinding, the CV joint itself may need replacement.
Driving with a damaged boot can destroy the joint in a matter of days, especially if water or dirt gets inside. Don’t delay repairs.
Common Signs Of A Bad Cv Joint Boot
Here are warning signs your boot may be damaged:
- Grease on the inside of the wheel or under the car
- Clicking sounds when turning
- Vibration during acceleration
- Visible cracks or splits in the boot
- Loose or missing clamps
Some people miss grease leaks because they clean their wheels often. Always check the boots themselves, not just the area around them.
Typical Lifespan Of Cv Joint Boots
A good quality CV joint boot can last 80,000 to 150,000 km, but this depends on driving conditions and maintenance. Frequent exposure to salt, mud, or extreme temperatures will shorten boot life. According to AAA’s Approved Auto Repair program, shops that employ ASE-certified or factory-trained technicians must meet strict standards for training, equipment, and customer service.
Here’s a comparison of boot lifespan by environment:
| Environment | Expected Lifespan |
|---|---|
| Dry, mild climate | 120,000 – 150,000 km |
| Wet/salty roads | 60,000 – 100,000 km |
| Off-road/dirt | 40,000 – 80,000 km |
Credit: www.yourmechanic.com
Cv Joint Boot Replacement Vs. Repair
When damage is small, repair may be possible. For example, a small crack can sometimes be sealed with special glue or a patch kit. However, this is a temporary fix.
Replacement is the best solution for serious damage. This involves removing the old boot, cleaning the joint, adding new grease, and installing a new boot with fresh clamps.
Here’s a quick comparison:
| Option | Cost | Time | Effectiveness |
|---|---|---|---|
| Repair Kit | Low | 30–60 mins | Temporary |
| Boot Replacement | Medium | 1–2 hours | Long-term |
| Joint Replacement | High | 2–4 hours | Permanent |
Professional Inspection Vs. Diy
Many people can check CV joint boots at home. However, if you find damage or are unsure, a professional inspection is wise. Mechanics can check for internal joint damage and replace boots using the right tools.
If you do it yourself, always use jack stands—never rely on the car jack alone. Wear gloves and be careful of sharp edges.
Tips For Extending Cv Joint Boot Life
- Clean regularly: Wash under your car, especially after driving in snow, mud, or salt.
- Avoid sharp turns at high speed: This puts extra stress on the joints and boots.
- Check after off-road trips: Stones and sticks can damage boots without you noticing.
- Use high-quality replacement boots: Cheap boots may crack within a year.
A non-obvious tip: Some modern boots are made from thermoplastic, which lasts longer than rubber. Ask your mechanic about upgrade options.
Frequently Missed Inspection Areas
Most people only check the outer (wheel-end) boots, but inner boots (near the transmission) can fail too. Inner boots are harder to see and often ignored. Use a flashlight and mirror to check these hidden areas.
Another common mistake: Not checking the boot with the wheels turned. Small cracks may only open up when the boot is stretched.

Credit: streetsmarttransmission.com
The Cost Of Ignoring Cv Joint Boots
Neglecting a torn boot can turn a $20 fix into a $300–$600 repair. If the CV joint fails while driving, you may lose control or become stranded. Some insurance policies won’t cover breakdowns due to lack of maintenance.
Cv Joint Boot Materials: Rubber Vs. Thermoplastic
Most original boots are made from neoprene rubber, which is flexible but can crack with age. Thermoplastic boots are tougher and last longer, but may cost more.
Here’s a simple comparison:
| Material | Pros | Cons |
|---|---|---|
| Neoprene Rubber | Flexible, cheap, widely available | Can crack, less durable in harsh climates |
| Thermoplastic | Very durable, resists chemicals | Less flexible, higher cost |
The Role Of Cv Joint Boot Clamps
Clamps keep the boot sealed at both ends. If a clamp is loose or missing, grease leaks and the boot can slip off. Always check both clamps during inspection and replace if rusty or weak.
Practical Example
Imagine you notice grease on your car’s rim. You check and find a small tear in the CV boot. You clean the area, but within a week, the clicking sound starts when turning. By then, the joint may already be damaged. Had you replaced the boot right away, you could have saved hundreds of dollars.
Final Thoughts
Regular CV joint boot inspection is a simple but powerful way to prevent major car trouble. With just a flashlight and a few minutes, you can catch problems early and avoid expensive repairs. Don’t wait for noises or leaks—build inspection into your regular car care routine. If you find damage, act fast to keep your car running smoothly and safely for years.
For more in-depth information on car maintenance and CV joints, visit the Wikipedia page on Constant-Velocity Joints.
Frequently Asked Questions
How Do I Know If My Cv Joint Boot Is Bad?
Look for grease leaks, visible cracks, or splits in the boot. Clicking noises when turning and vibration during acceleration are also signs of a bad CV joint or boot.
Can I Drive With A Torn Cv Joint Boot?
It’s not safe. Driving with a torn boot allows dirt and water to enter, quickly damaging the joint. This can cause total failure and loss of control, especially at high speeds.
How Much Does It Cost To Replace A Cv Joint Boot?
Boot replacement usually costs between $100 and $300 at a repair shop, including parts and labor. Doing it yourself can reduce the cost to $20–$60 for parts.
Is It Better To Replace The Boot Or The Entire Cv Joint?
If the boot is damaged but the joint is still quiet and smooth, replacing only the boot is enough. If the joint makes noise or feels rough, the whole joint may need replacement.
How Long Does A New Cv Joint Boot Last?
A high-quality boot can last 80,000 to 150,000 km under normal conditions. Lifespan is shorter in harsh environments or with poor maintenance.
Credit: rubberandseal.com
